Day 4: First Generation
Each day should not take you more than 10-15 minutes worth of efforts.
Welcome
Today we will start our first code generation and generate an event directly from the Event Model in Miro. You will also learn about the typical cycle while developing a code generator.
You can follow along in the Video here:
https://www.youtube.com/watch?v=wSgOUg-vfL0
Step 1: Run the Code Generator Service
First, choose an empty folder on your machine and run your local code-generator-service using this docker command:
docker run -ti -p 3001:3000 -v $PWD:/workspace --name codegen --rm nebulit/codegen
(Make sure to pull the latest image before using docker pull nebulit/codegen)
Remember the location of this folder, you will open it in your local IDE later.
Step 2: Open Event Model in Miro
You then open the Event Model in Miro, and switch to the Code Generator Tab.
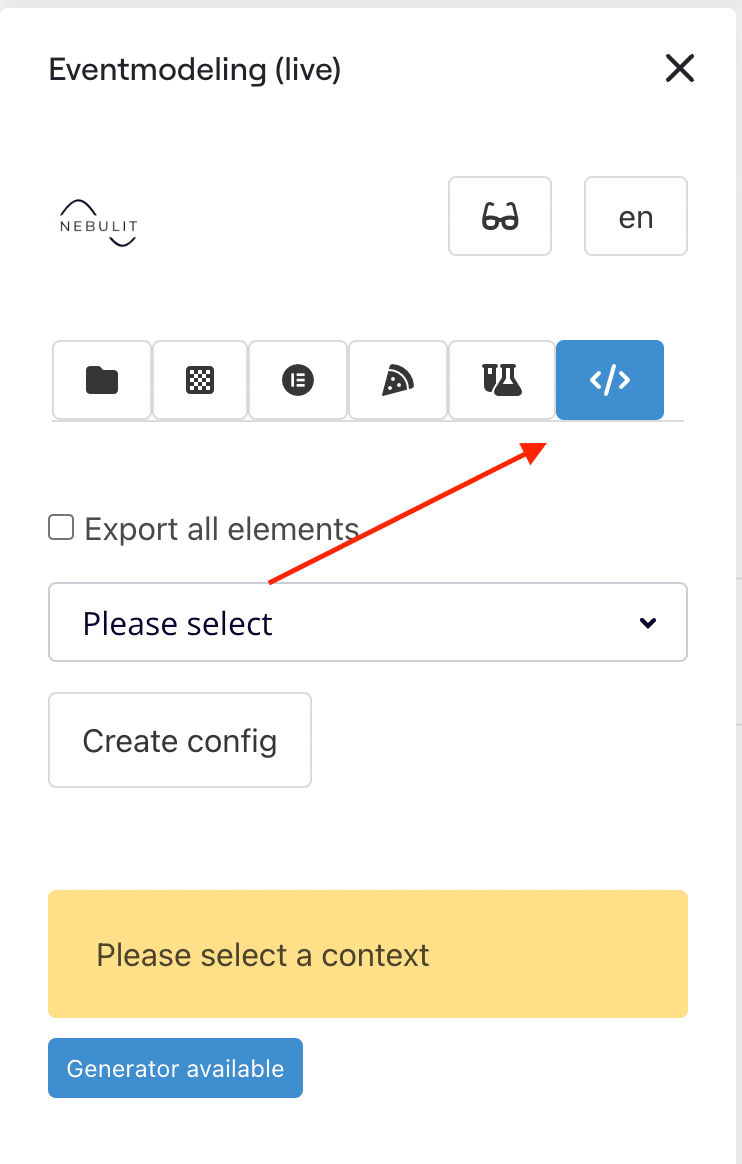
Select your Model-Context in the Drop-Down - make sure your generator is available (happens automatically if the docker container is running)
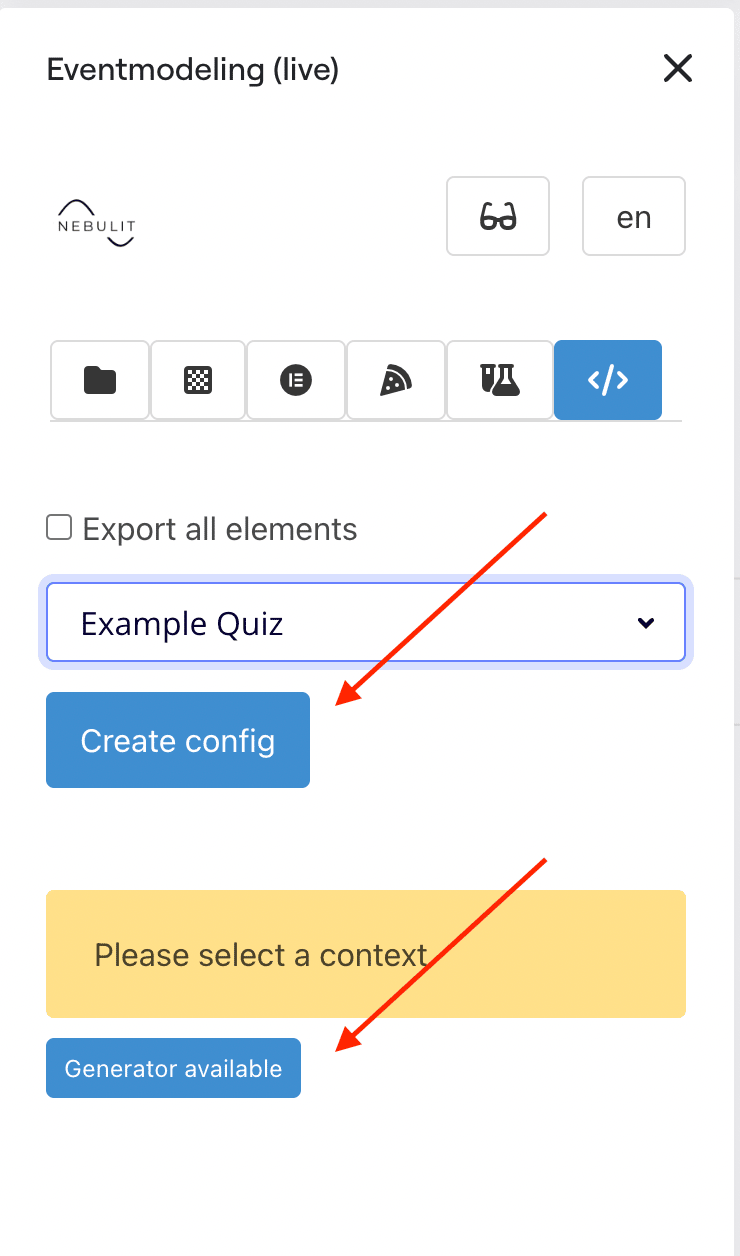
Step 3: Create Config
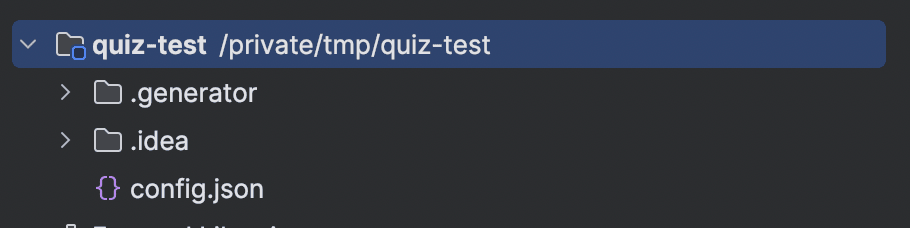
“Create Config” exports your Event Model to a config.json file on your local machine.
Now switch back to your local container.
You can generate the “sample-generator” by calling the “gen” command in your container.
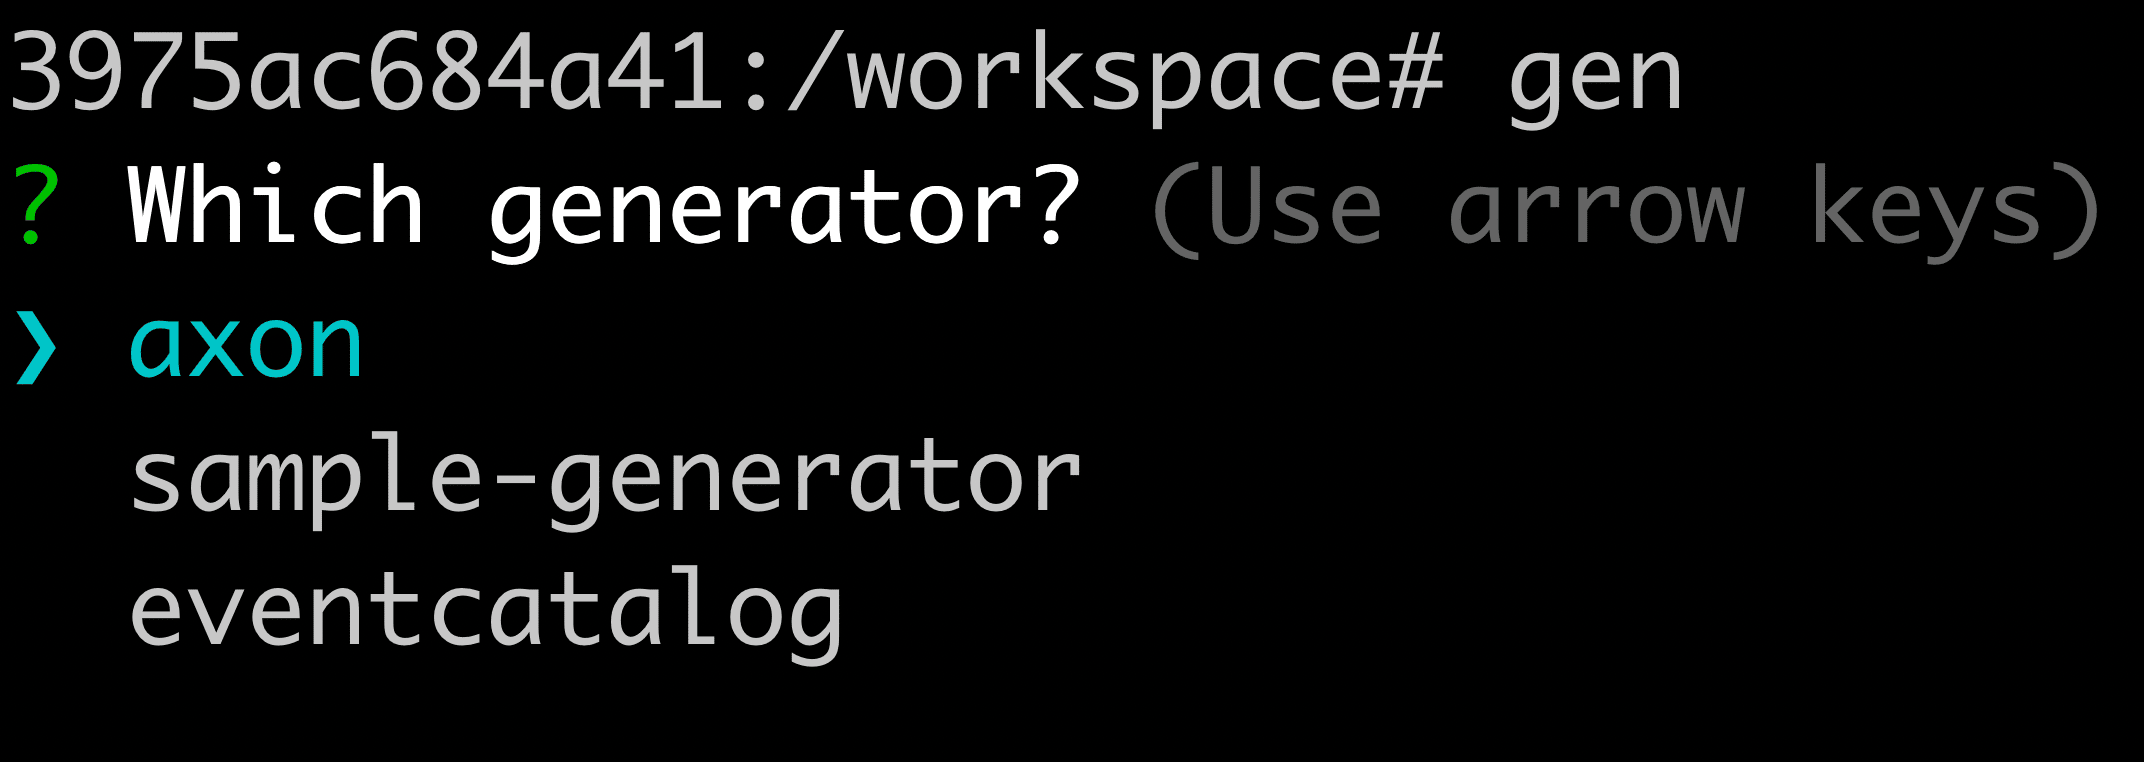
Select “sample-generator” - this will generate a template for a code-generator in a “.generator” folder.
Step 4: Install Dependencies
Switch to the .generator/app folder and run “npm install” once.

Step 5: Inspect the Generator
You now have a first executable code generator locally. You can open the folder you used initially to run the code-generator container in your Editor of choice (in the video I’m using IntelliJ). You can already inspect the .generator-folder.
Step 6: Run the Generator
Back in your running docker-container, we will now run the generator once by running:
gen .generator/app
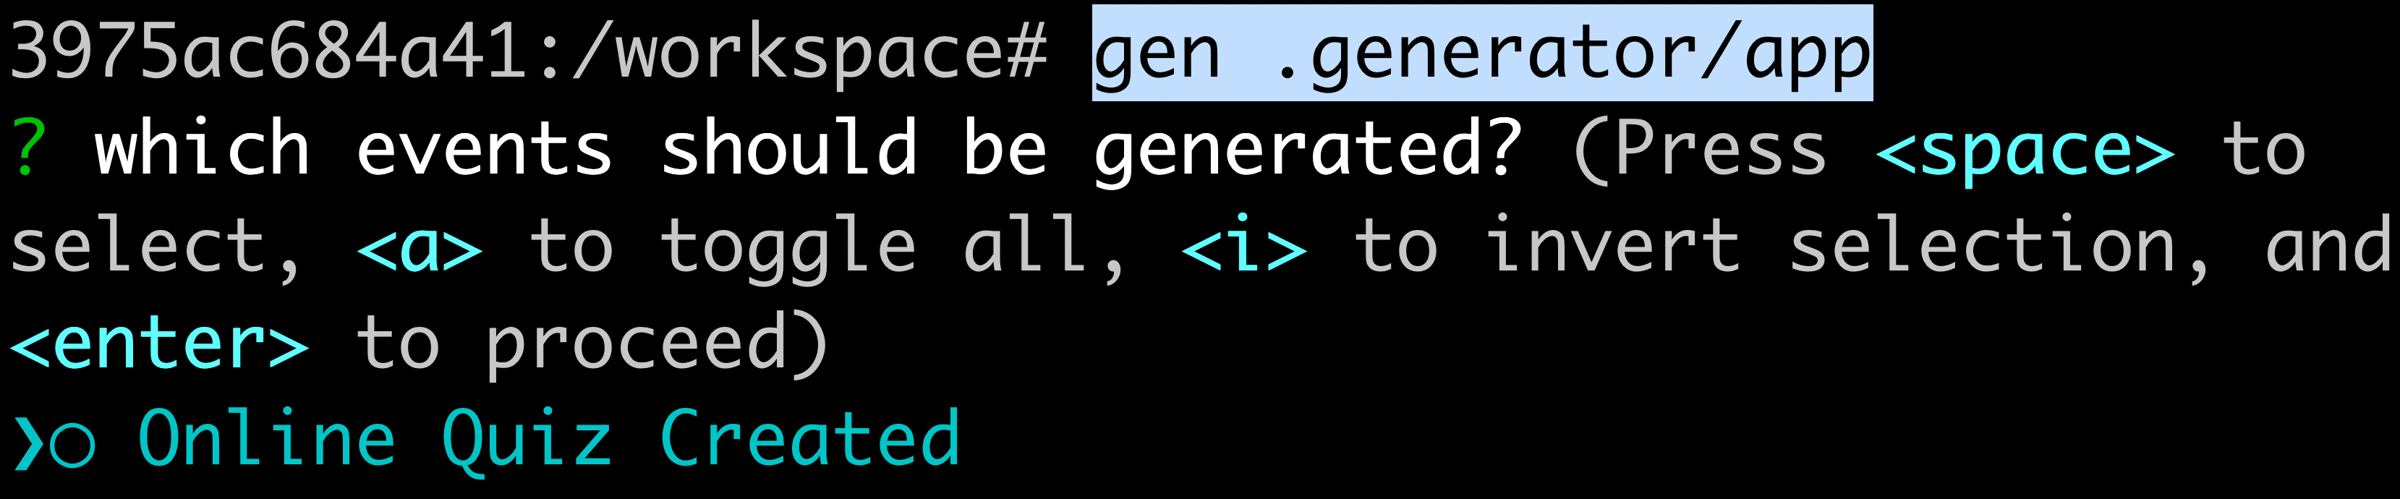
This will analyze the exported config.json and ask you which events to generate. Select the Event by hitting space and then enter.

Congratulations!
You just generated your first code.
That’s all for today. Tomorrow we will adjust the code generator to our needs.
See you tomorrow!
Tools you need
- Git: https://github.com/dilgerma/eventsourced-quiz
- Accelerate Miro Toolkit: https://miro.com/marketplace/eventmodeling/
- Miro Board: https://miro.com/app/board/uXjVLDkT_FA=/
Things you should consider
If you already want to dive deeper into Eventmodeling and Eventsourcing - here are some links for you.
- Book “Understanding Eventsourcing”
- Companion Online Course - “Implementing Eventsourcing” (includes a full license of the Miro Toolkit)
- Podcast “Eventmodeling & Eventsourcing”
- Eventmodelers.de
- Eventmodeling Tutorial
Learning Eventmodeling faster with your Team - you can book me for Training & Consulting. I’m offering very flexible bookings packages, even on demand. Just answer to this E-Mail if you want to learn more.
See you tomorrow!
| Previous: Day 3 - JSON Structure | Next: Day 5 - Custom Generators |