
Real Time Prototyping
The Miro Event Modeling Toolkit allows you to export running Prototypes directly from your Model. This is first a pretty fun experience in a workshop, but also a great way to validate your assumptions by just playing with what was just modeled 2 minutes ago.
Preparation
Real Time Prototyping requires some preparation. You need to tell the system how projections should work, how data should be displayed and stuff.
RTP ( Real Time Prototyping ) can be configured on Screens, Read Models and Commands.
Select any of those elements and open the Documentation
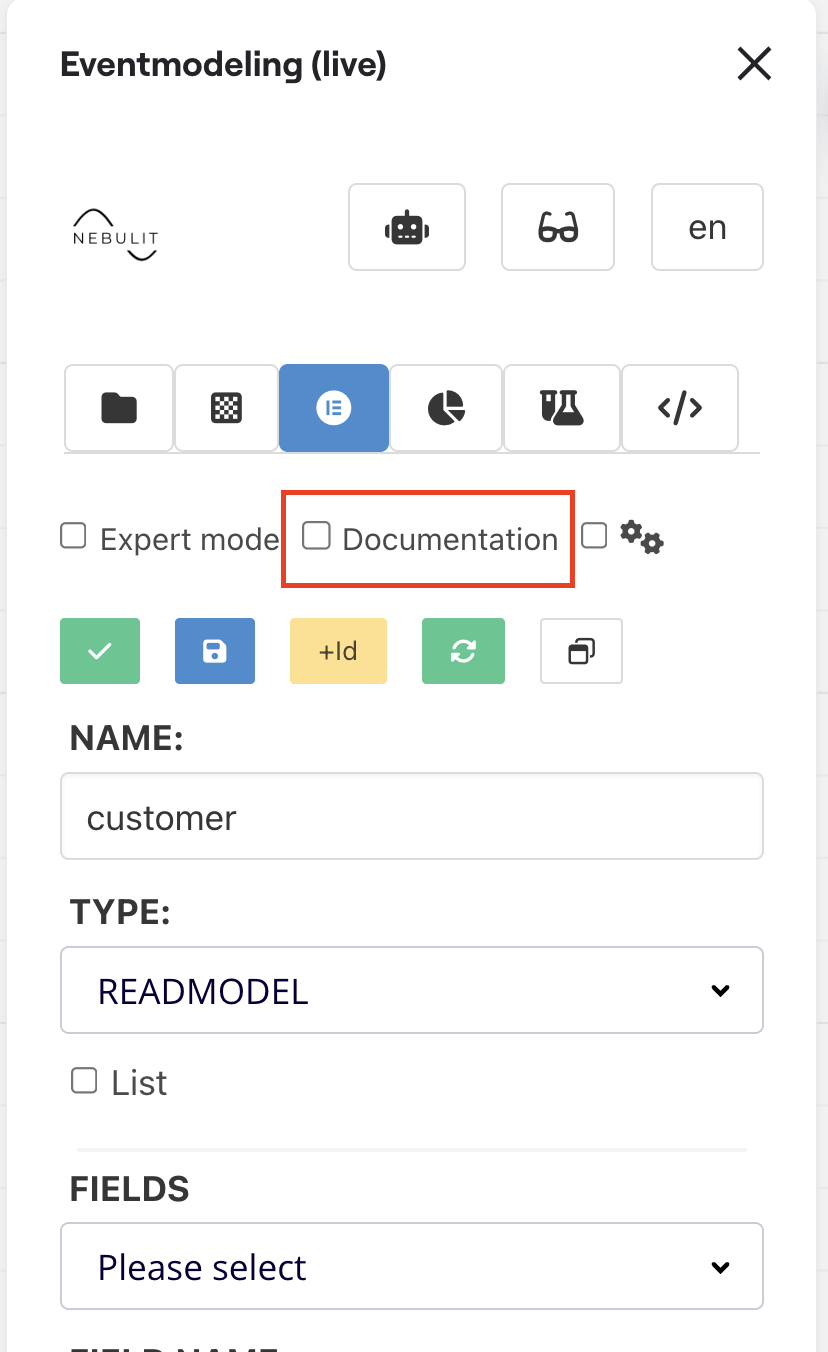
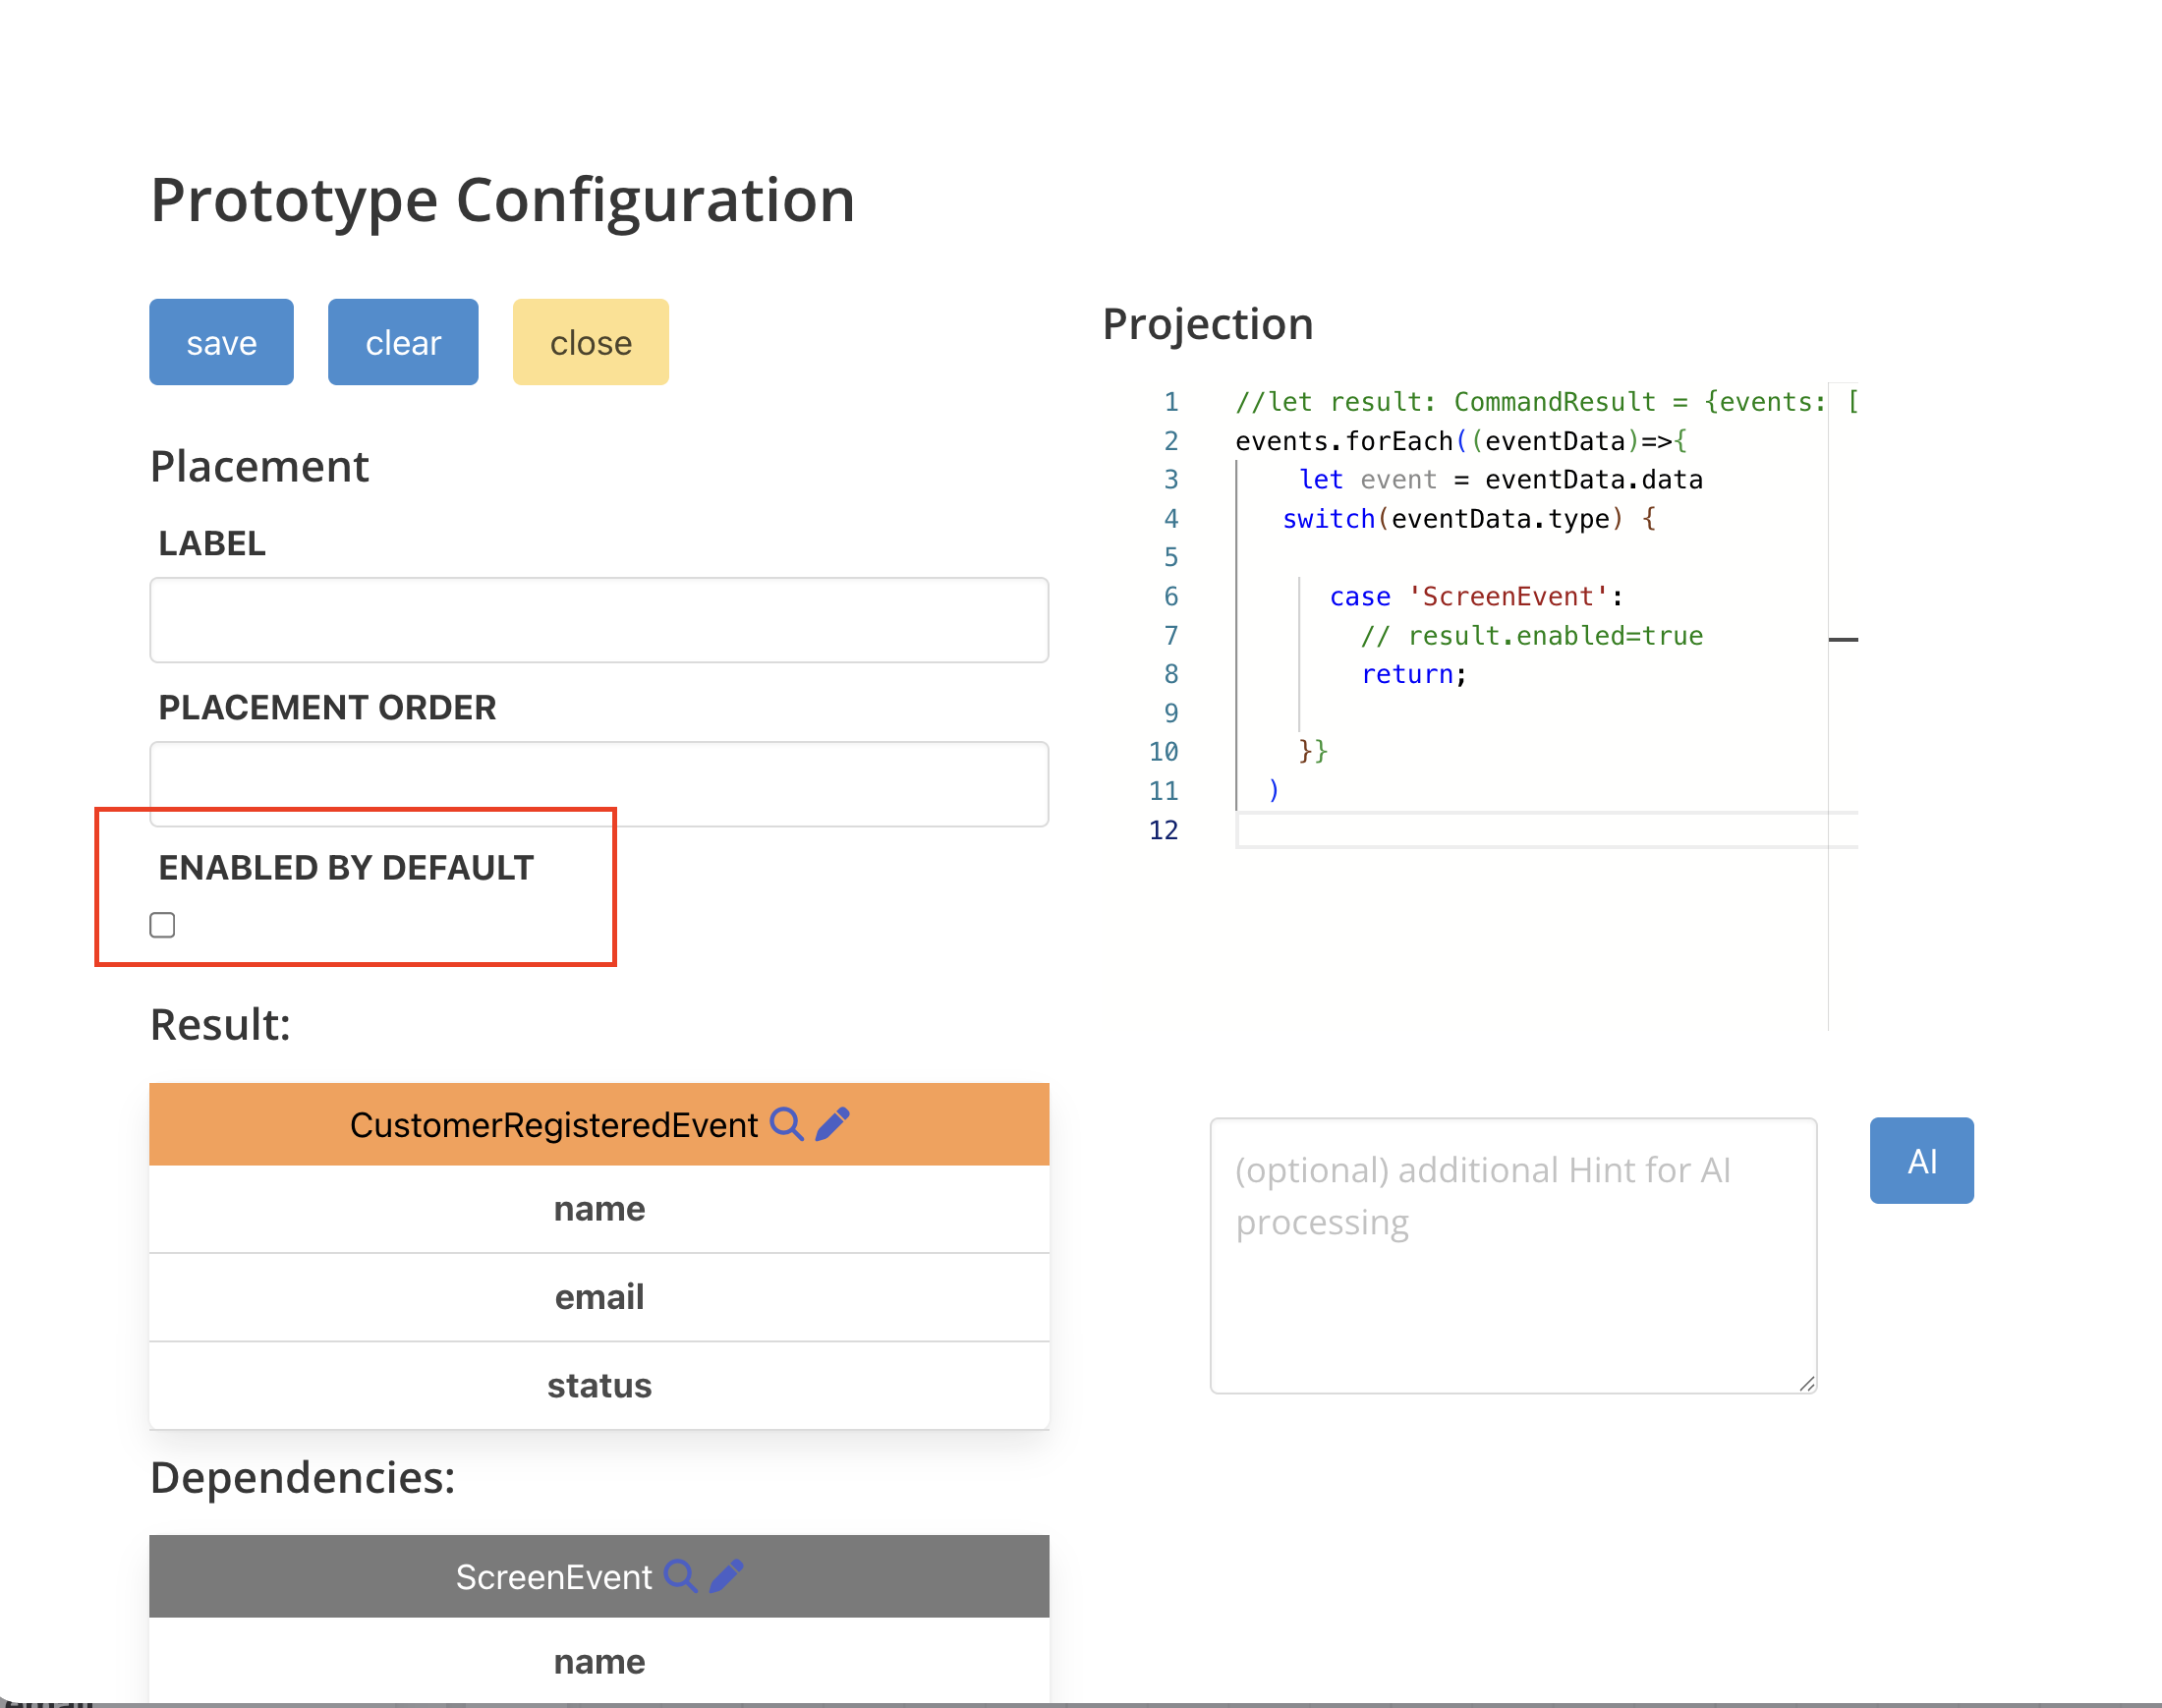
In Documentation you find the Prototype-Configuration

This basically looks the same for each element:
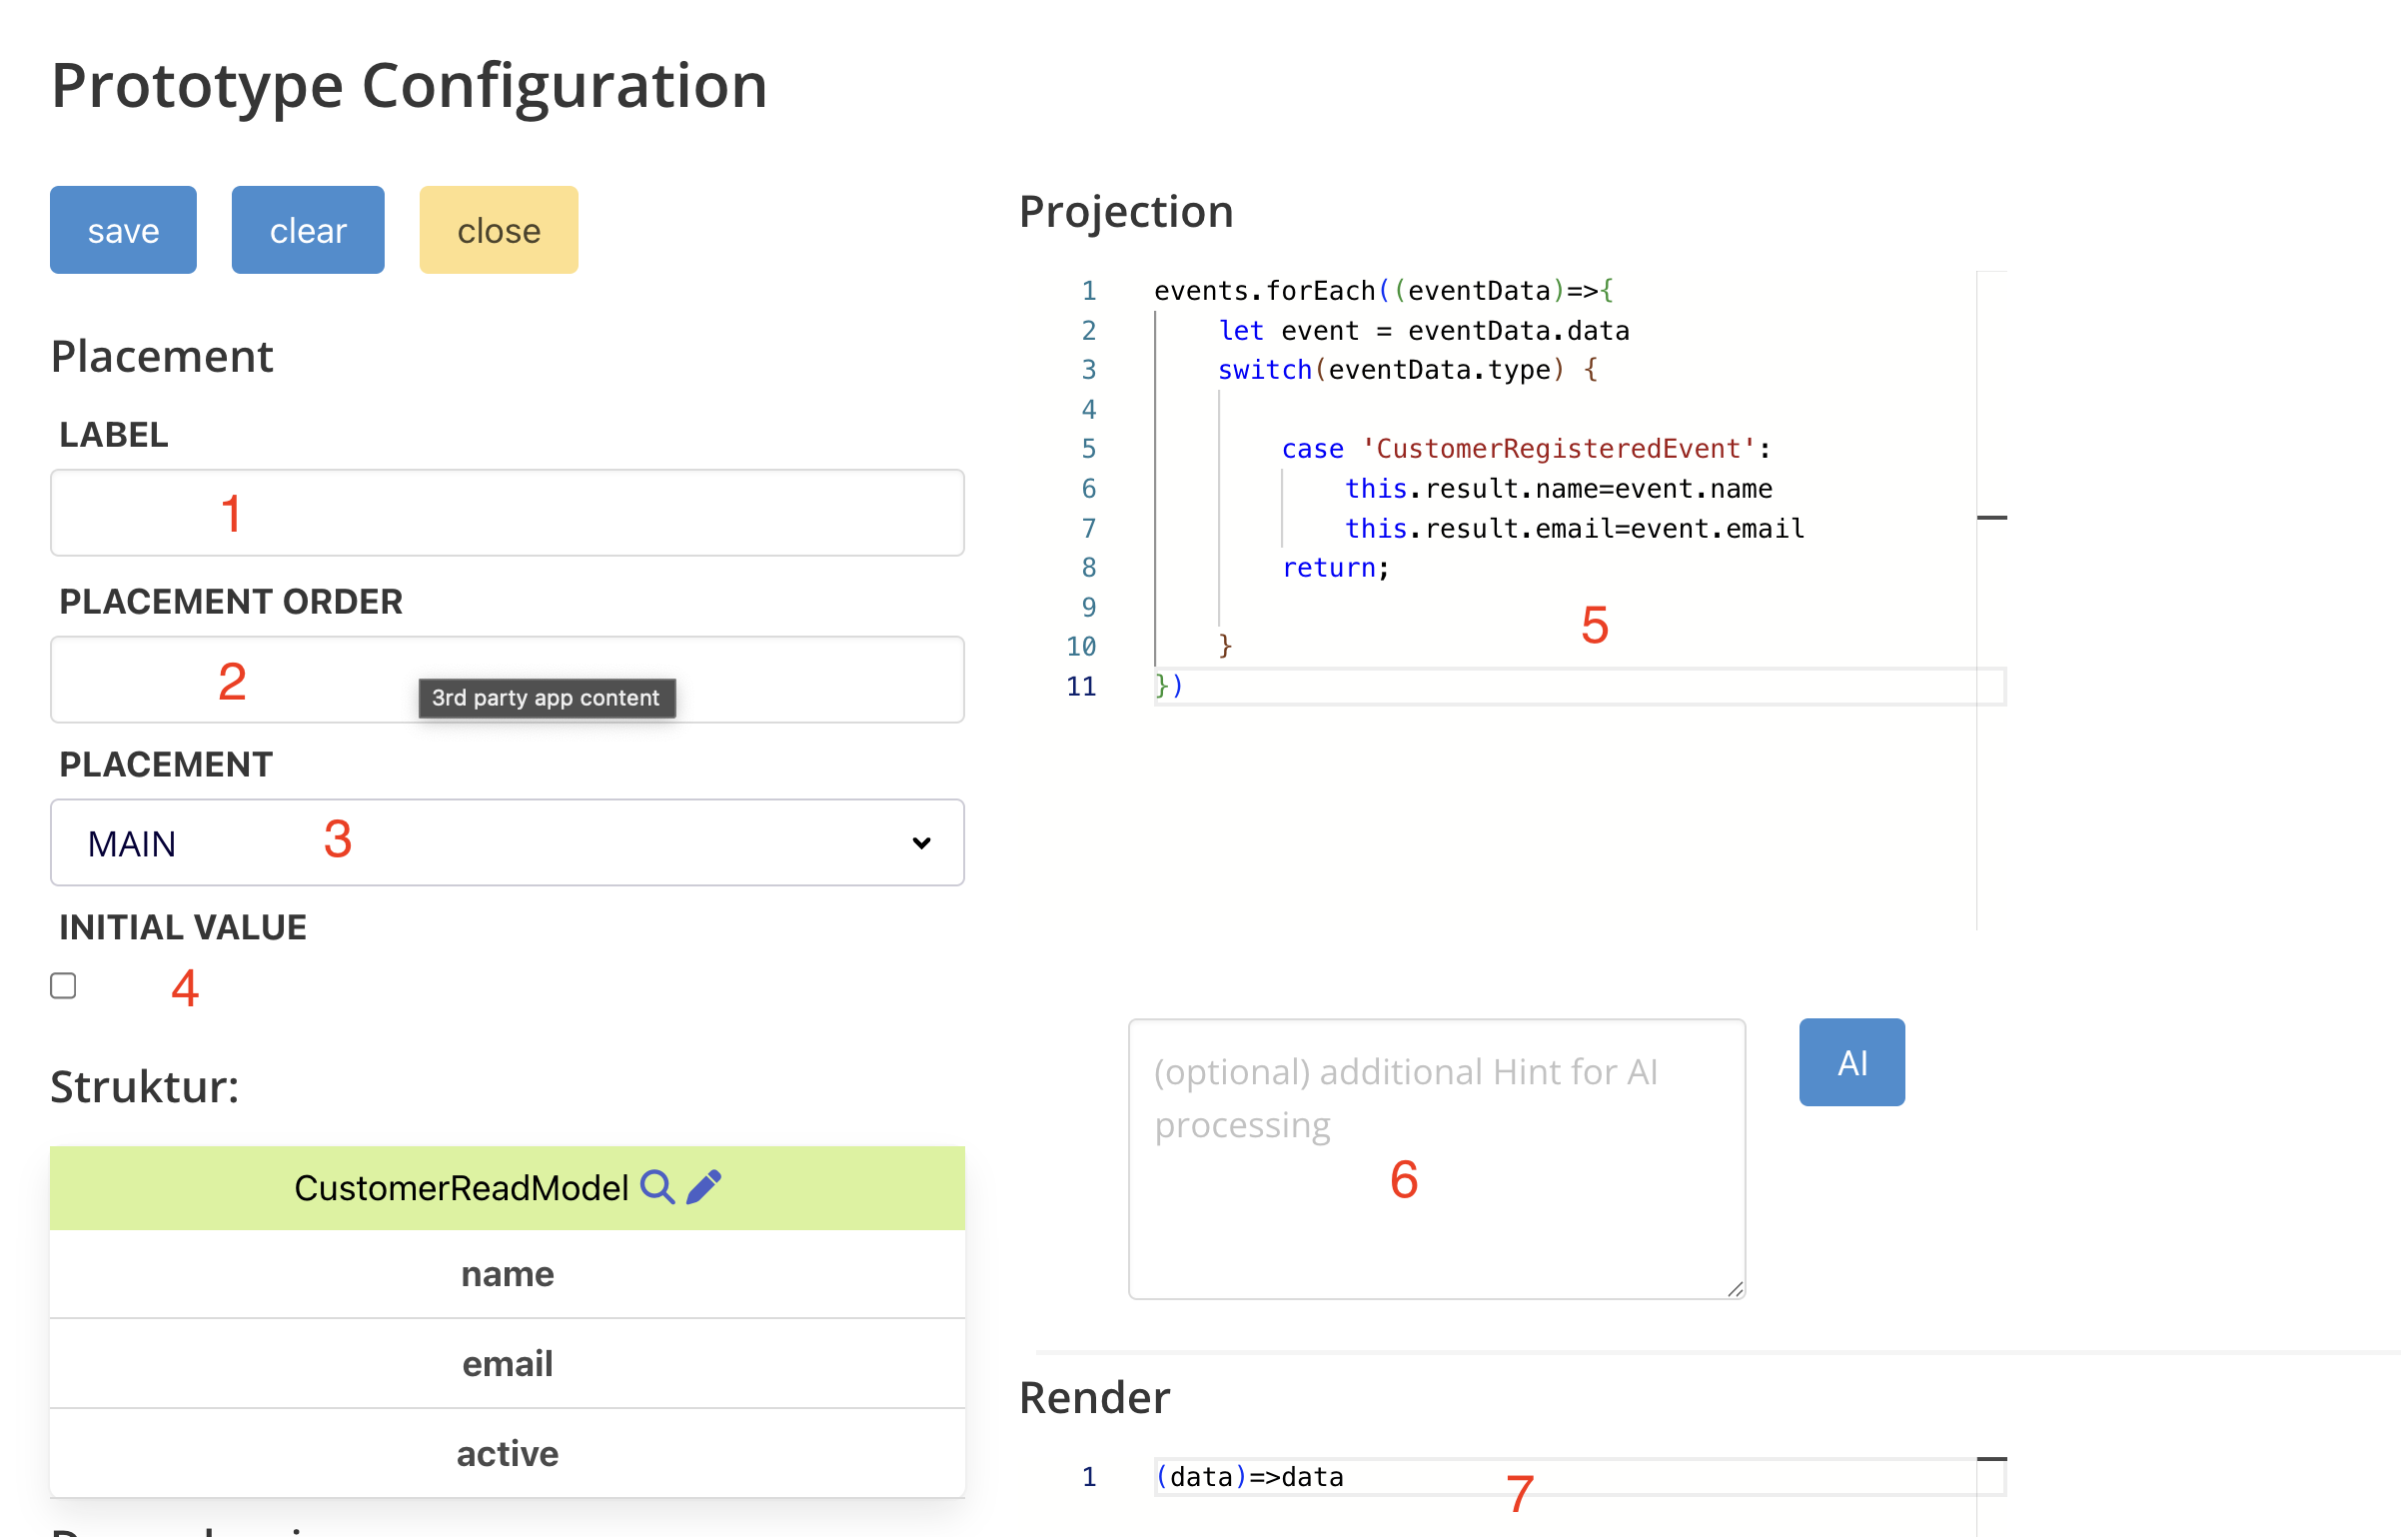
1) Label of the Element ( for a Read Model, this is the headline, for a command this is the button text )
2) Order of the element - controls placement of elements within the same screen. Lower numbers come first.
3) Placement - the prototype has a main area and a side area. This control where elements are placed
4) Defines if an initial value should be set, or if it should be undefined ( basically nothing ). For a command allows you to activate by default.
5) Allows you to build the projection ( also AI can generate this if enabled ). For a Read Model, this is how data is projected. For a command, this is how the Command Model is projected.
6) Only available if AI is enabled, let´s you prompt for the projection code
7) Let´s you define how data should be rendered
Example Projection Code
events.forEach((eventData)=>{
    let event = eventData.data
    switch(eventData.type) {

       	case 'CustomerRegisteredEvent':
			this.result.name=event.name
			this.result.email=event.email
    	return;

    }
})
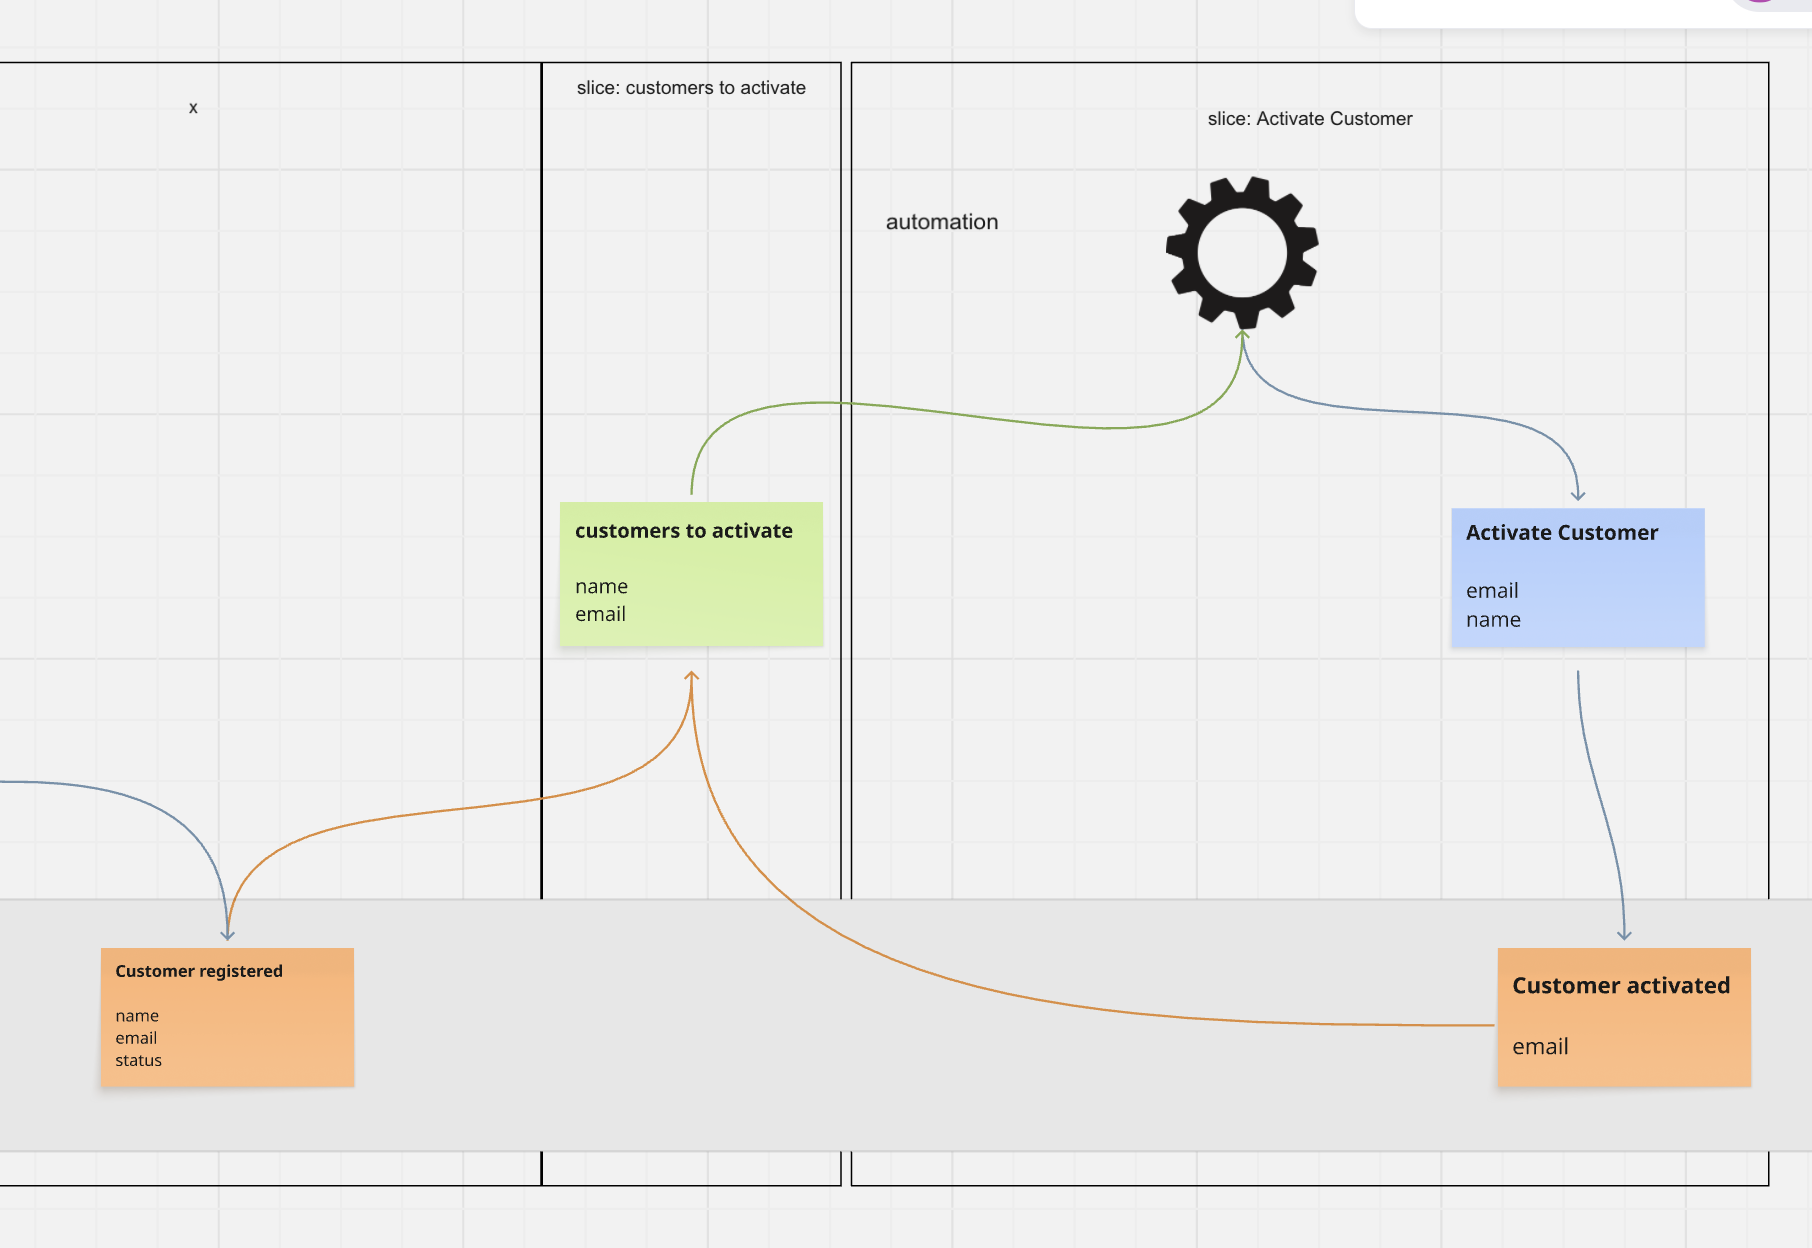
Typical example of a List Model
The Projection in this case would look like this:
events.forEach((eventData)=>{
    let event = eventData.data
    switch(eventData.type) {

        case 'CustomerRegisteredEvent':
            this.resultList.push({
                email:event.email,
                name:event.name
            })
            return;

        case 'CustomerActivatedEvent':
            this.resultList = this.resultList.filter(item => item.email !== event.email)
            return;

    }
})
A simple hint to AI typically provides the correct code.
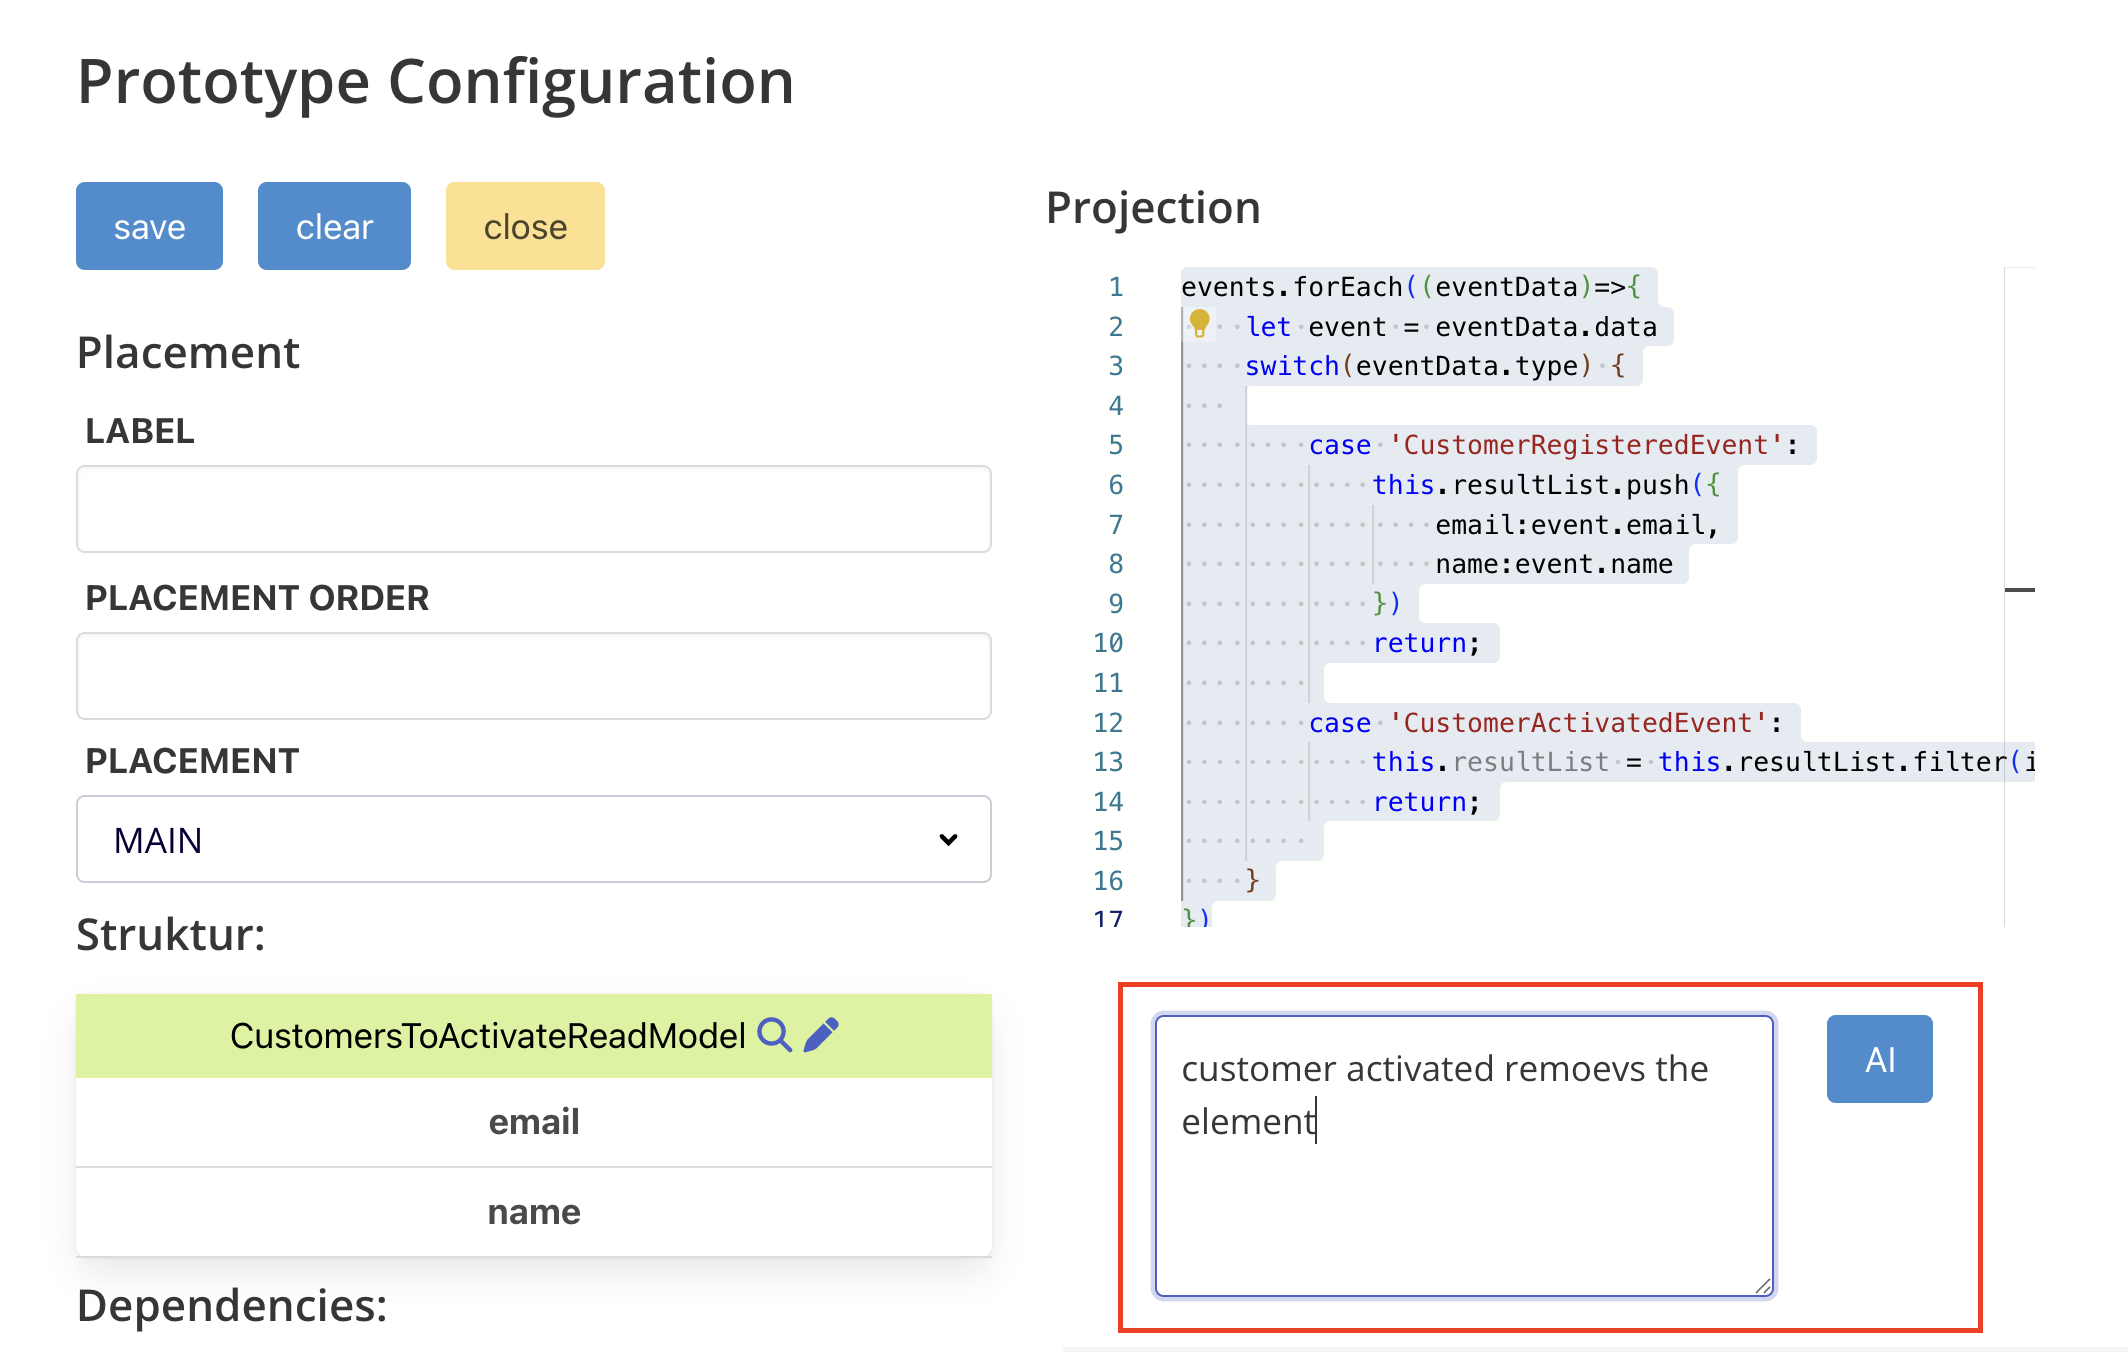
For Read Models you project into “this.result”, which is an object you can fill. For a List, you just append / remove from the list.
Code like this is auto-generated for you and you can adjust it.
Render Logic
“Key” controls what is displayed in the drop down. fields controls which fields are displayed. Note - you don´t control “how” data is displayed, that is what happens in the projection for the Read Model.
()=>{ return { key: "period", fields: ["period","name"]}}
Command Activation
If you want a command to be active by default, active it in the configuration.
Using AI for Prototype Layouts
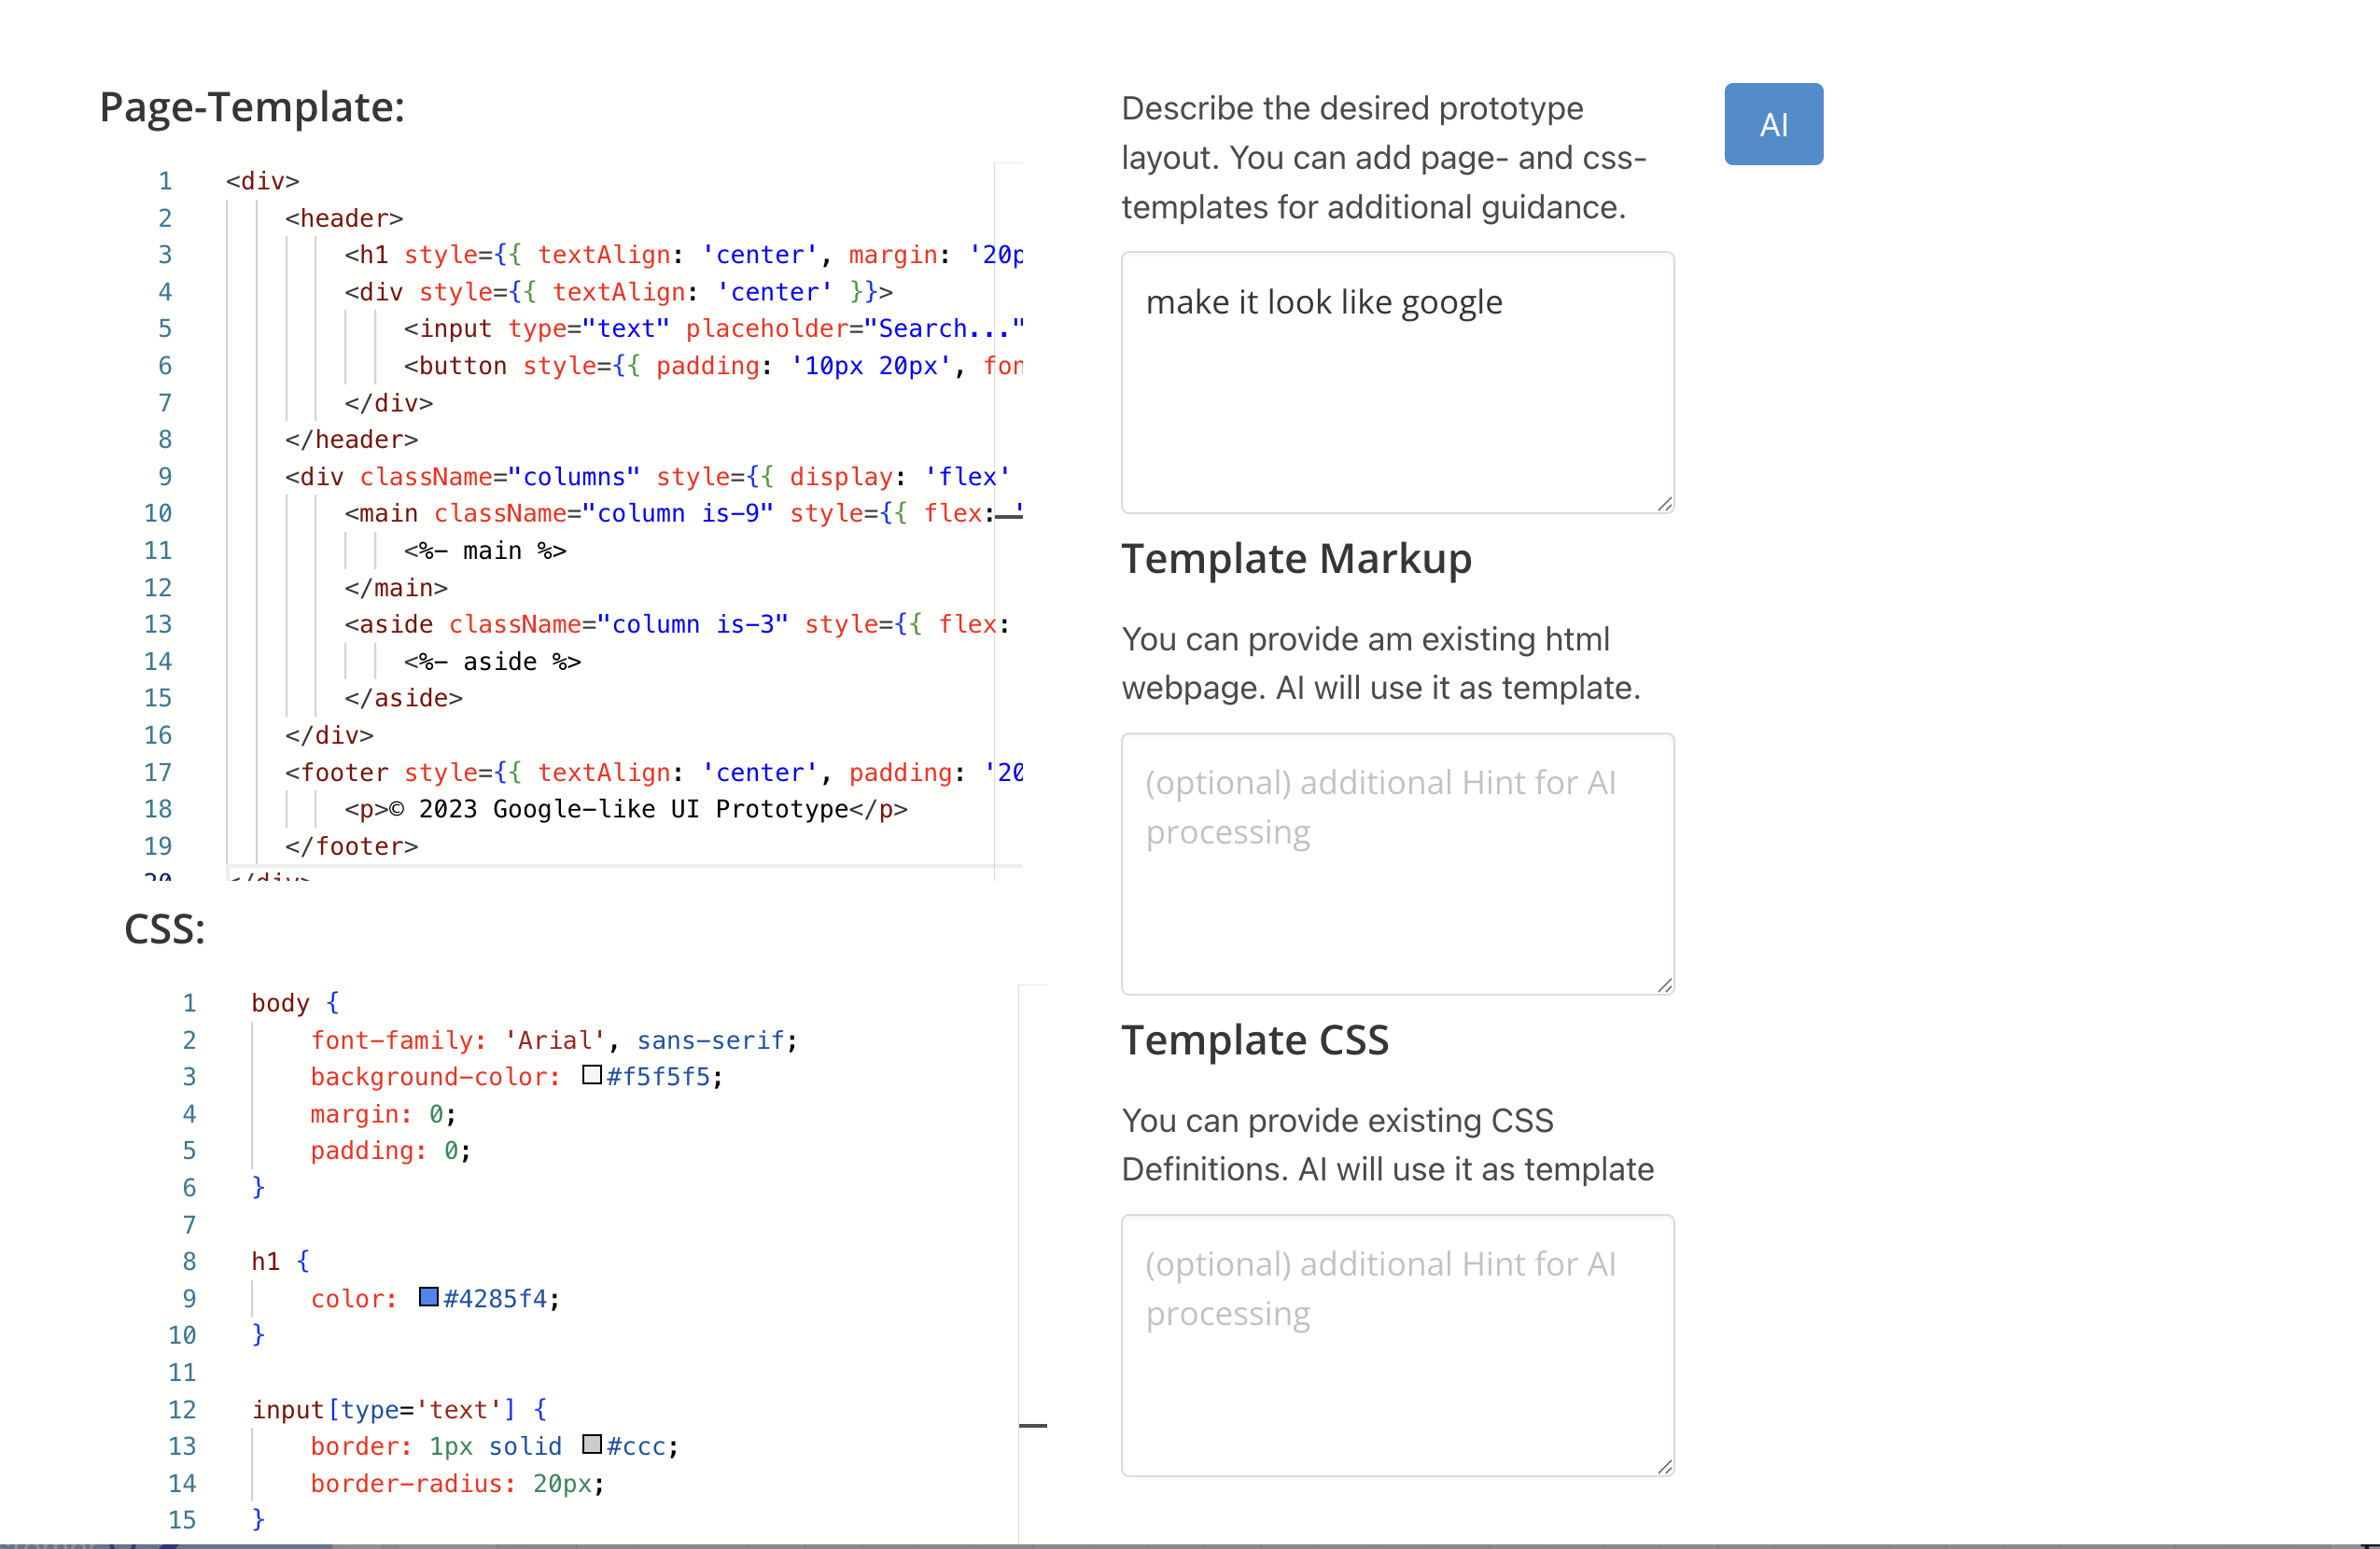
You can use AI to layout your prototype.

1) General Layout - you can adjust this manually as you like.
2) Here you can provide custom CSS that will be made available to each page
3) Prompt for AI. You can provide prompts like “make it look like google” or go into much more detail. This is only available if AI is enabled.
4) + 5) - Templates that will be made available to AI to generate the final markup and stylesheets. So you can paste your styleguides here and they will be taken into account.
6) By clicking you start the AI generation
AI will now come up with a simple Layout + CSS Stylesheets.
Important: Even if you provide the styles on one specific screen, they will always apply to all screens.
Starting the Prototype
To start the prototype, you need to have the code-gen Container running locally ( you need Docker for that )
docker run -ti -p 3001:3000 -v $PWD:/workspace -e HOST_WORKSPACE=$PWD --name codegen --rm nebulit/codegen
Select a Context and create the Configuration.
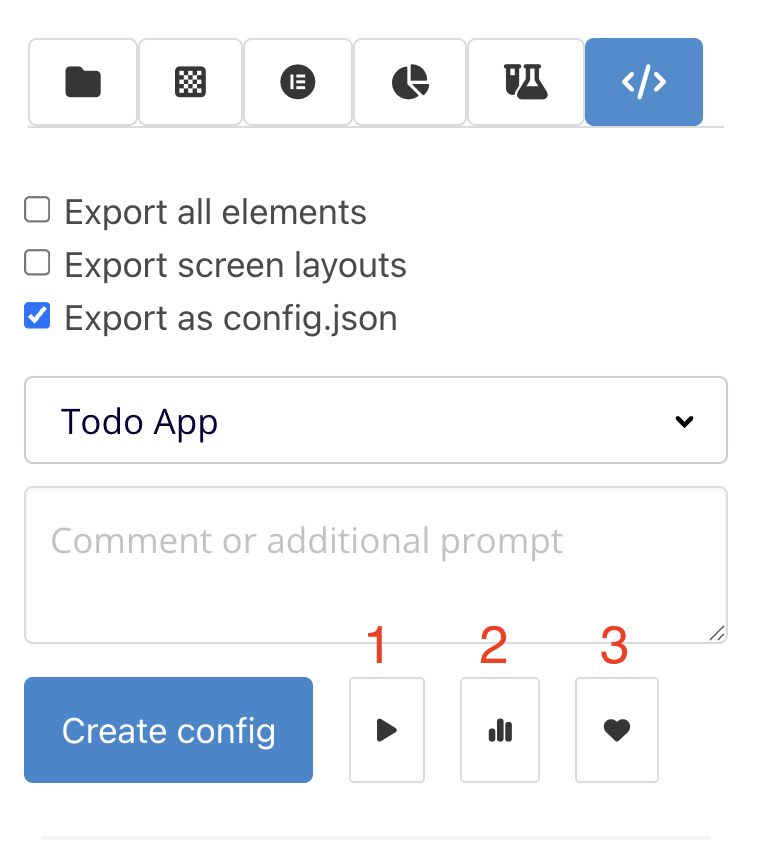
As soon as the exported Configuration is available, you can now choose between:
1) Jump to generated Prototype ( is generated automatically - may take a minute )
2) Jump to the Slice Forecasting
3) Send data to Lovable to generate UI Prototype ( Lovable Account required )
Clicking (1) will open a new Tab pointing to http://localhost:3001/prototype
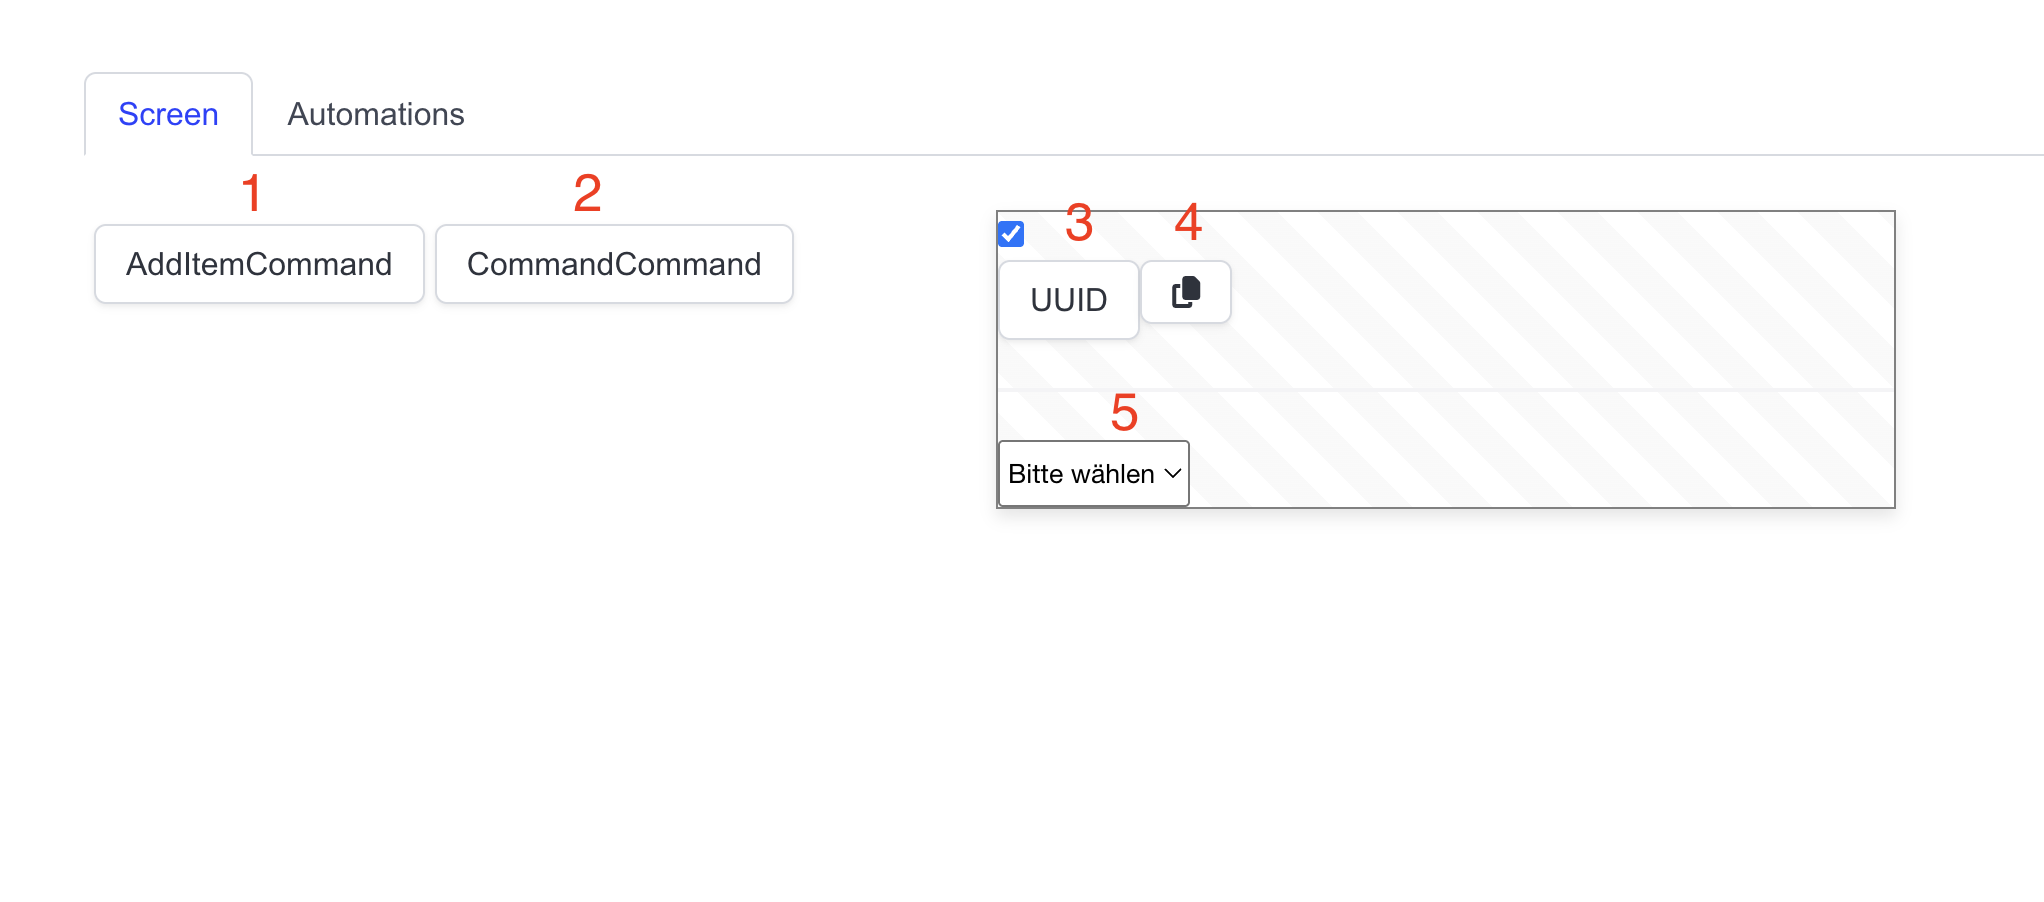
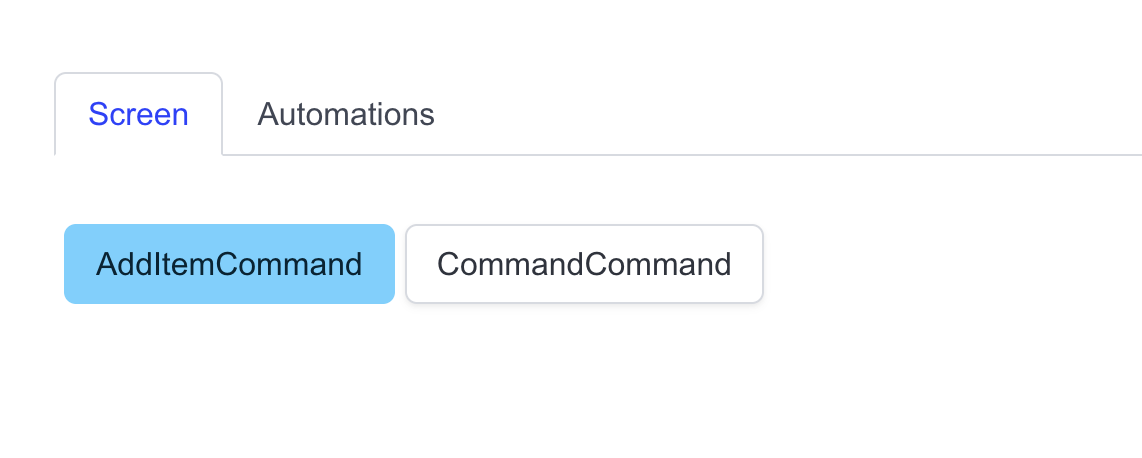
1) + 2) Rendered Commands ( here in the picture all Commands are disabled, you cannot click them )
3) + 4) Generates a new UUID + Copy to Clipboard ( just a small helper )
5) Shows the internal Event Store ( running in the Browser )
Now whenever you update the Model and export a new Configuration, the Prototype is updated automatically ( no reload required )
For example activating the Command by default enables the Button after a few seconds.
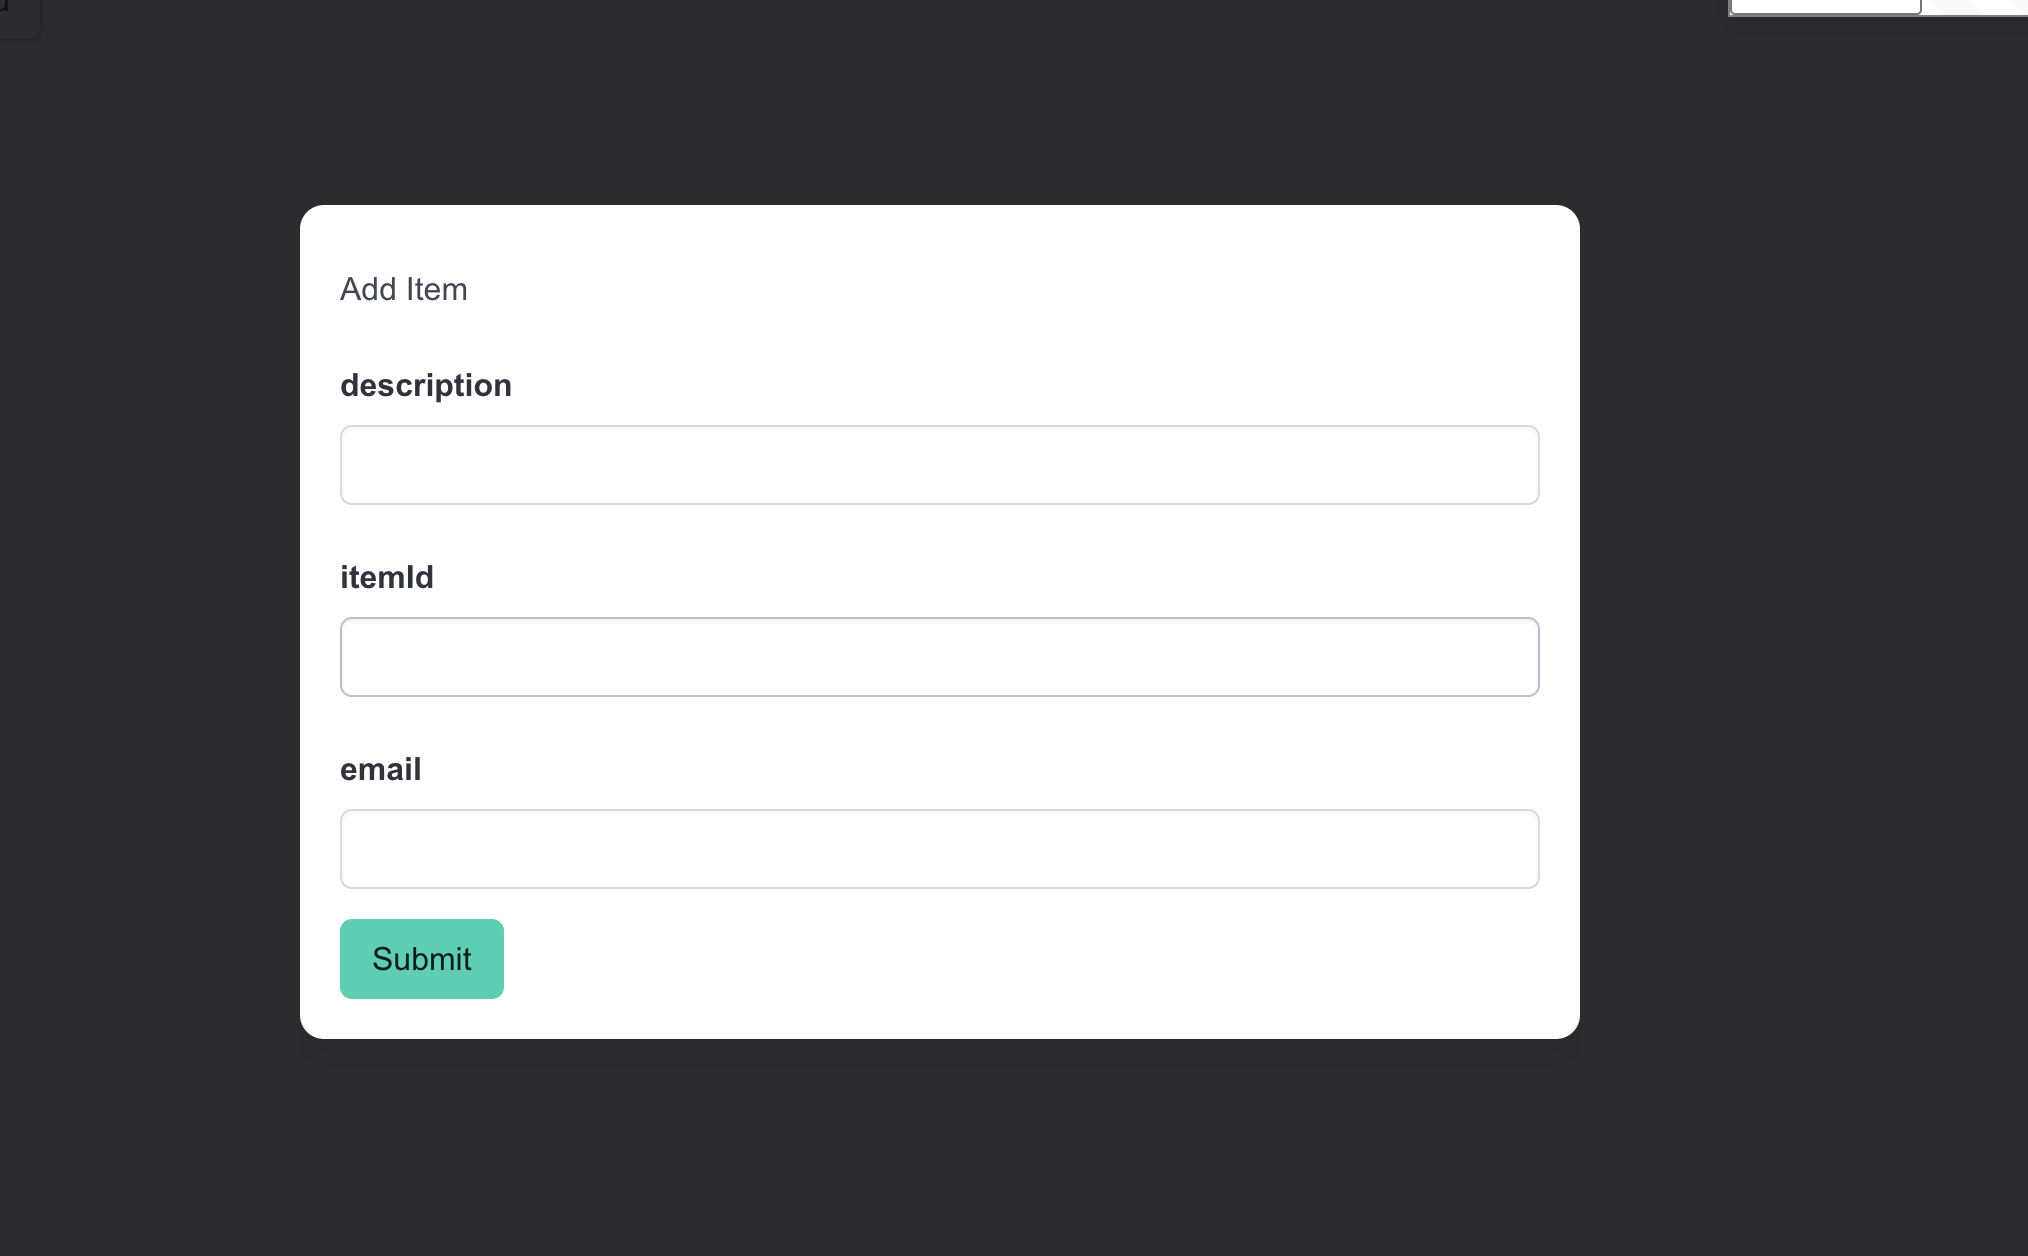
Clicking a command automatically opens the dynamically generated pop up. If you change your Model, fields are automatically updated and removed.
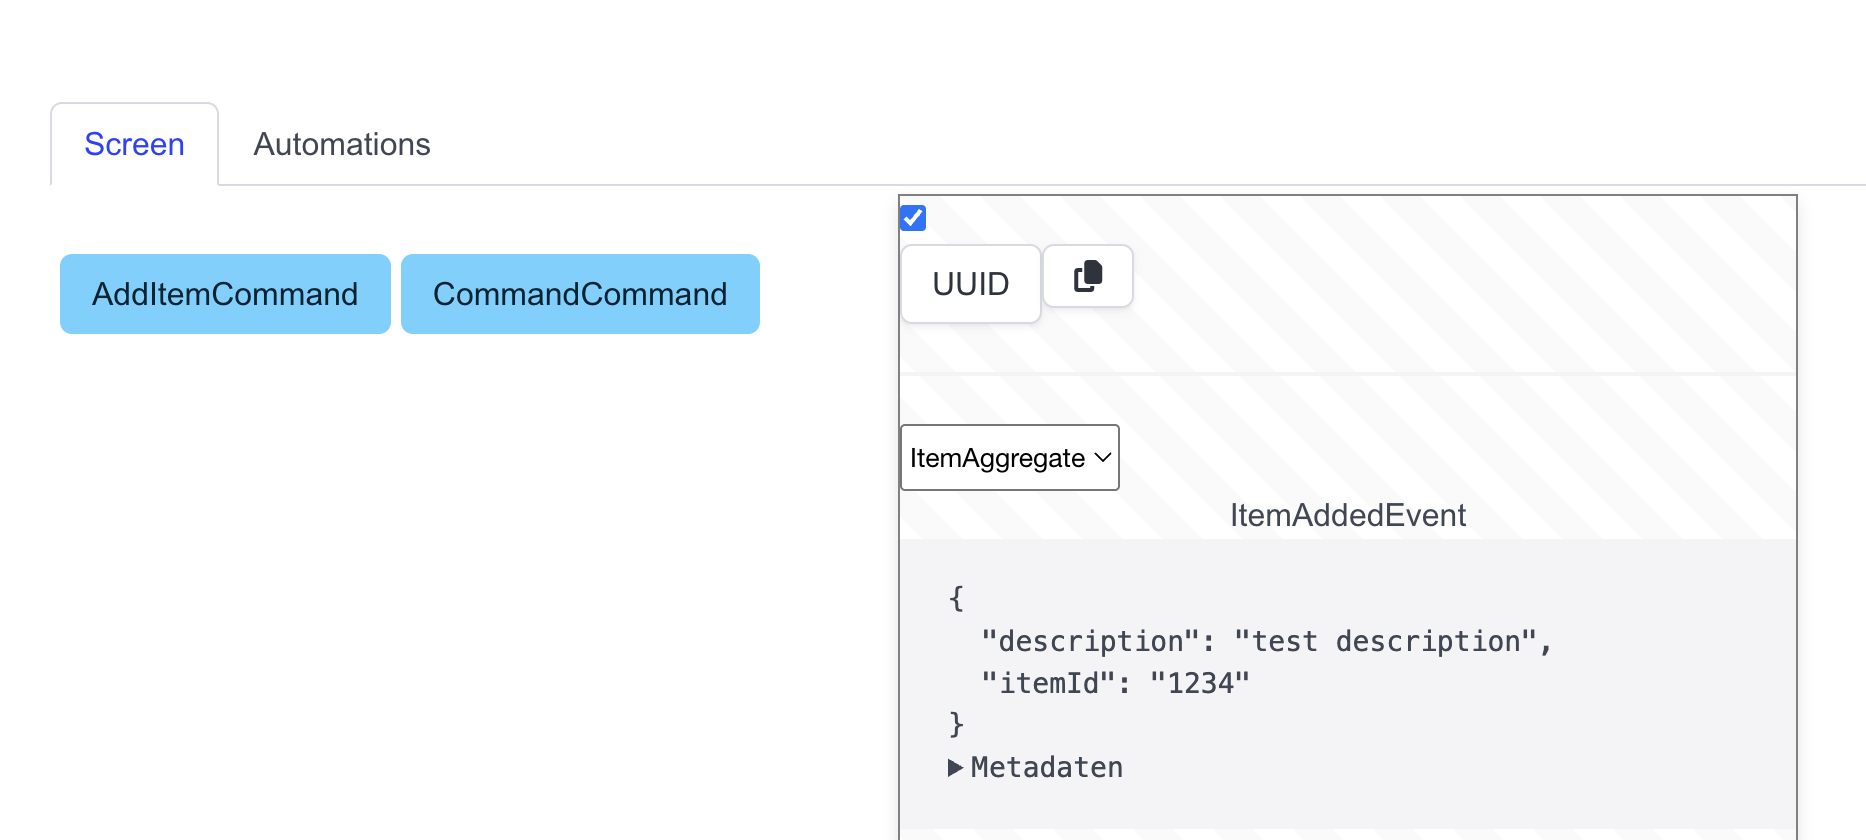
All Events are available within the Event Store
Any Read Model connected to the screen will be rendered as a Drop Down

You can place commands within your Markup like this:
<button data-command="Add Item">Search</button>
Clicking on the rendered button will then automatically fire the “Add Item” Command.
Placement
Screens with the same name are the same Screen in the Prototype. So if you have a Screen named “Registration” firing two different commands, these screens will be rendered as one screen in the Prototype, which has two Command Buttons.