
Data View
This View allows you to adjust the schema for each element. Provide fields, change namings, types and more. This screen adjusts for each element type.
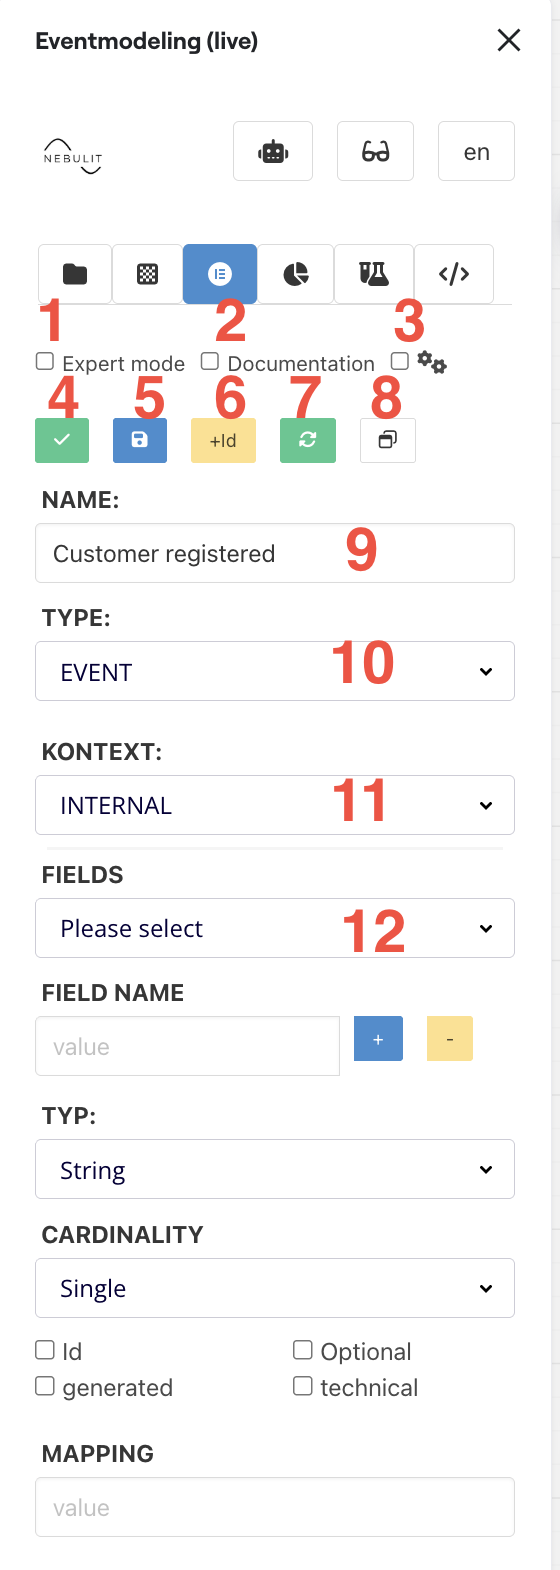
Key Features:
- Expert Mode - allows you to directly edit the JSON of the Element
- Documentation - allows you to provide additional information and also see all dependencies directly
- Settings - allows you to adjust the settings for displaying information on the sticky notes
- Re-Validate data - whenever an arrow shows red, revalidate makes sure, all data is up to date (happens automatically most of the time, but sometimes, manual revalidation is necessary)
- Save element
- Adds an “aggregateId” field to the element
- Syncs all copies on the board - If you have duplicated elements, this makes sure, all copies have the same data
- Opens the configuration in a pop up window for easier editing
Field Definitions
This section allows you to define new fields and types on each element
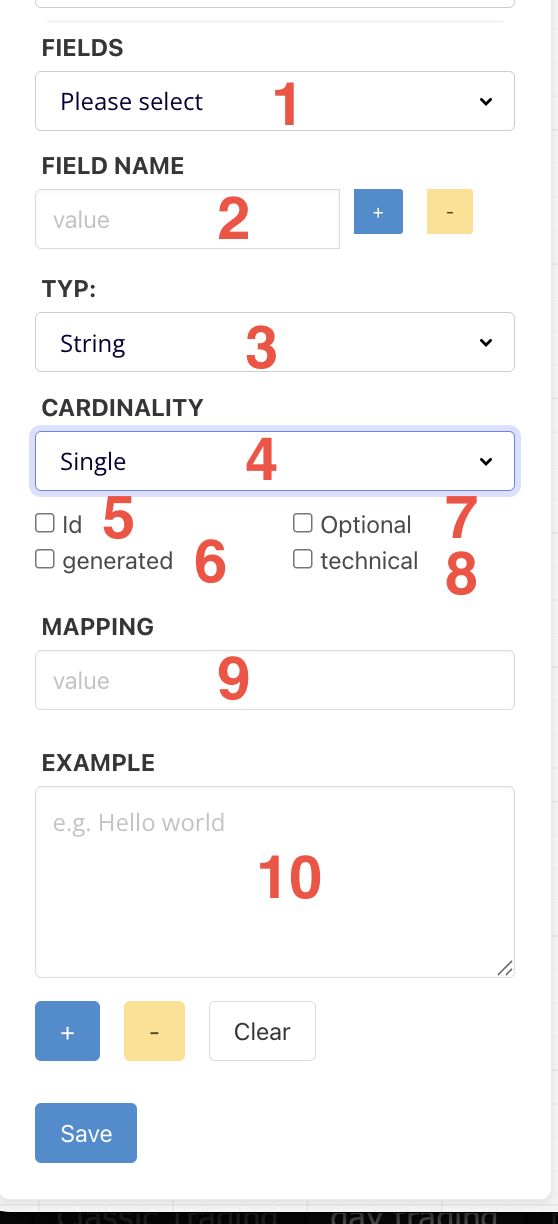
- First select the field
- Edit fieldname
- Edit field type
- Cardinality - allows to set a type as a single element of a list of elements
- Marks field as “id”
- Marks field as “generated” - the information completeness check won’t complain
- Marks field as optional
- Marks field as technical - can be hidden from stakeholders
- Defines the mapping for the information completeness check
- Allows to provide examples - Examples should be strings or valid JSON for custom types
Supported Data Types
- String
- UUID
- Boolean
- Double
- Decimal
- Date
- DateTime
- Long
- Int
- Custom
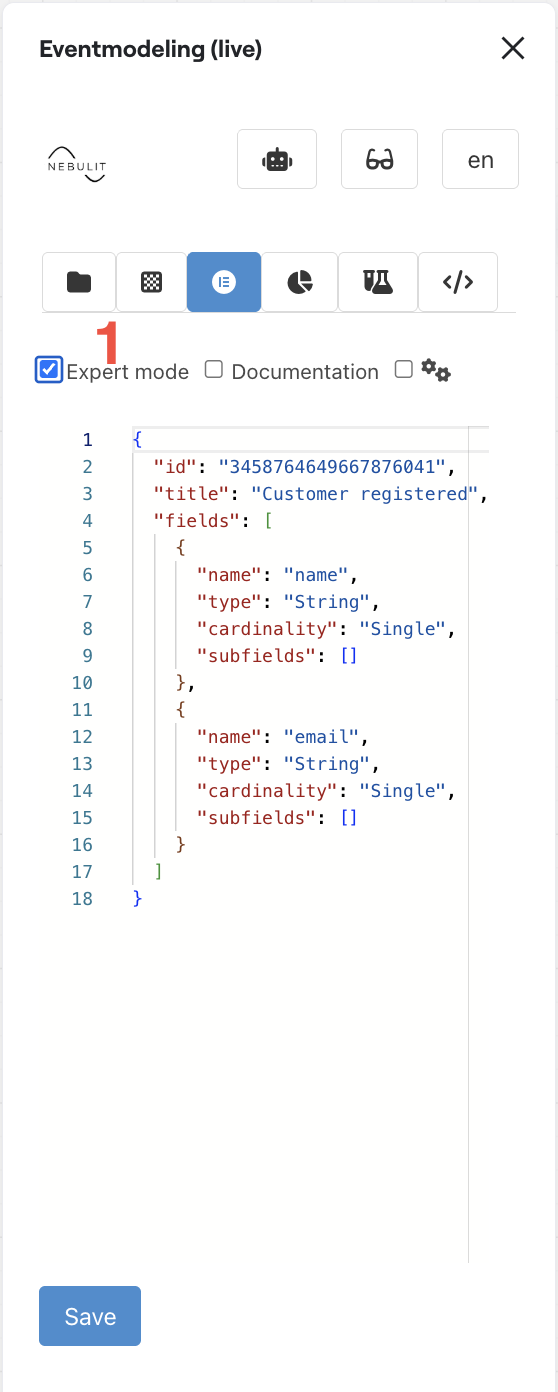
Expert Mode
Expert Mode allows to edit the JSON of an element directly.
Configuration
Configuration allows to adjust how information is displayed on sticky notes.
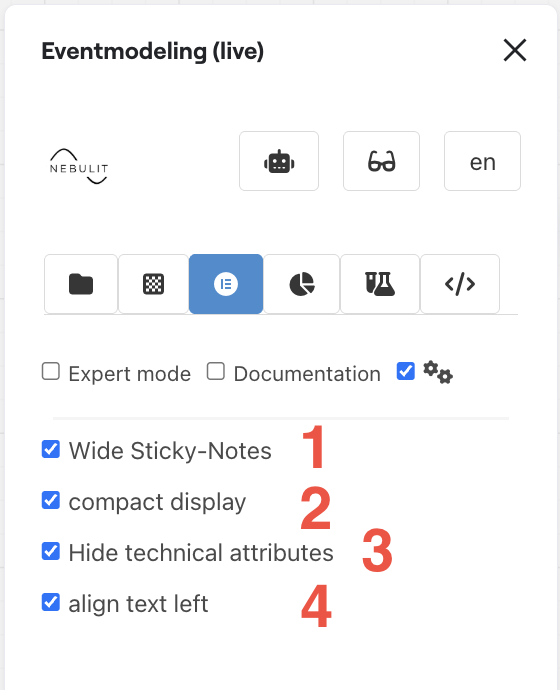
- Always use wide sticky notes - not square ones
- Compact display - hides type information
- Hides technical attributes - like “ids” from stakeholders
- Left-align sticky notes - default is centered
Documentation
Documentation allows to provide additional information for an element.
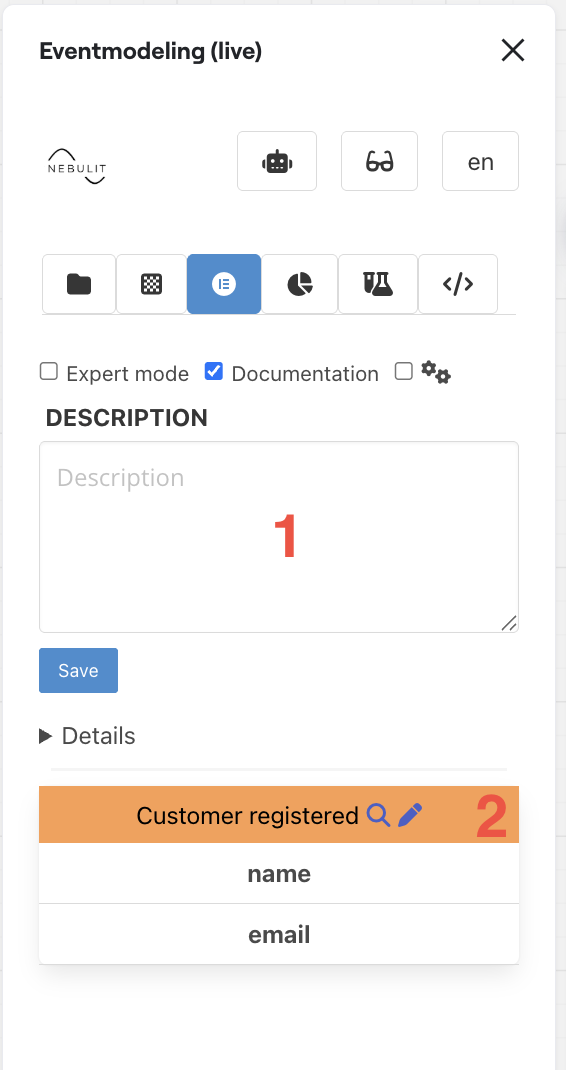
- Provide Documentation
- See element details and also all dependencies
Command View
The Command View allows to define command specific information like API Endpoints.

- Define an alternative API Endpoint - by default it’s the slice name
- Opens the RTP (Real Time Prototype Configuration)
- See the Element Details and also where information is coming from (in this image, there is no mapping defined for the fields)
- Shows the events this command result in (after successful processing)
Read Model View
The Read Model View allows to define Read Model specific information like API Endpoints.
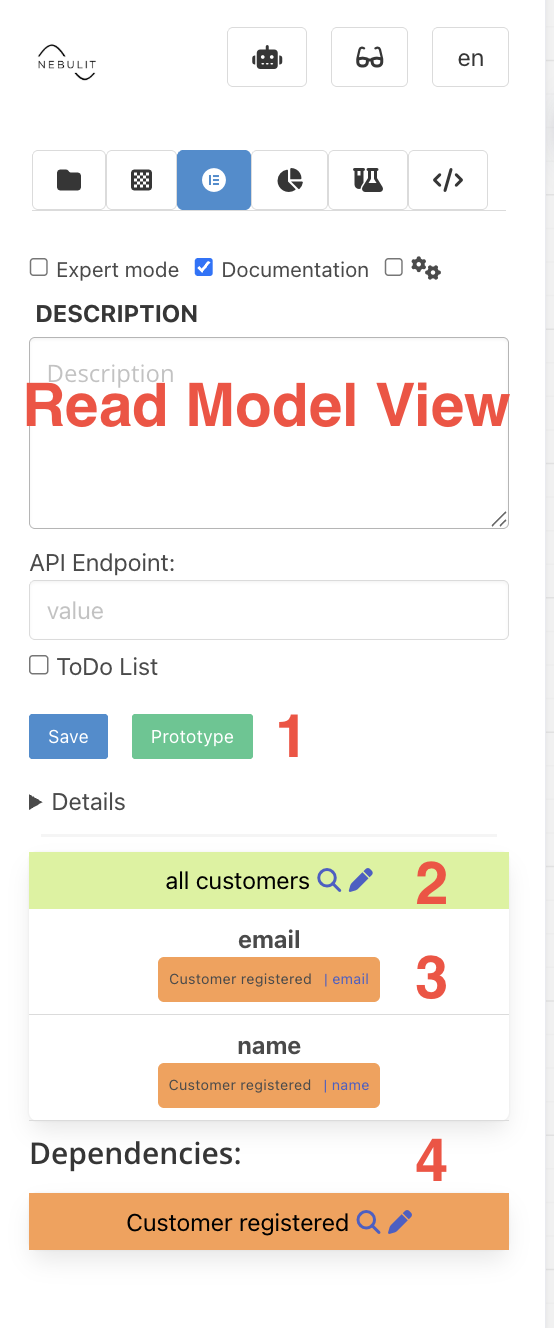
- Opens the RTP (Real Time Prototype Configuration)
- See the Element Details and also where information is coming from (in this image, we see that both attributes in the Read Model are mapped from the “Customer registered” Event)
- Attribute mapping information
- Shows the events this Read Models depends on
Next Steps
- Information Completeness - Selecting and Copying elements