
Slice View
This View only shows something if you select a slice.
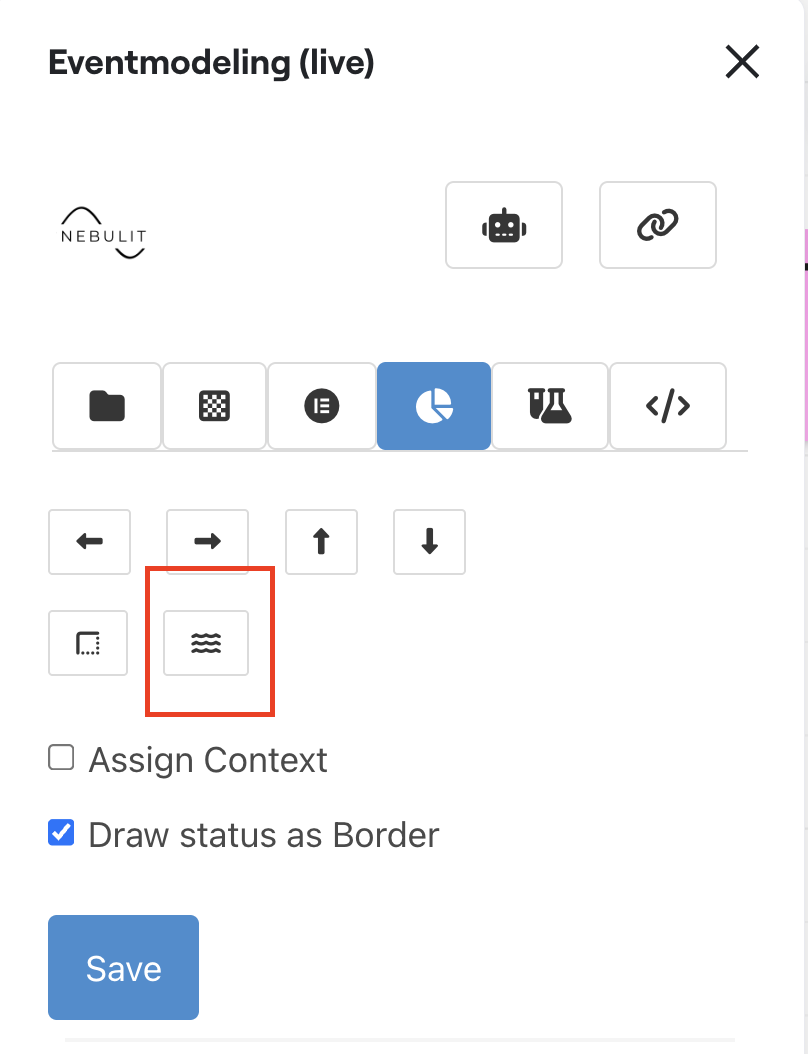
You can create slices by selecting the elements that should belong to a slice and clicking (5) This will draw a border around these elements. Whatever is inside the border belongs to the slice.
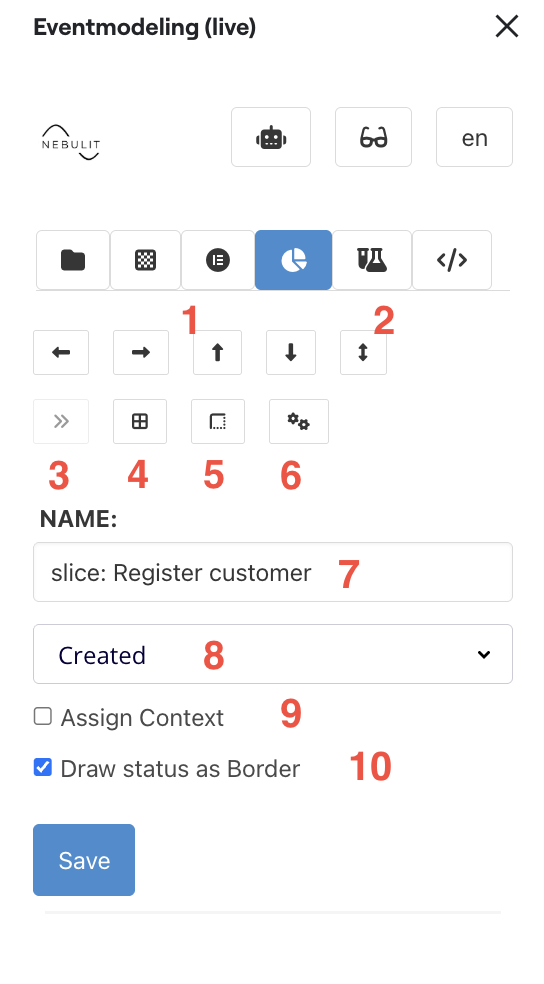
Key Features:
- Move selected elements - left, right, up, down
- Increase the slice size vertically
- Select all slices to the right - have to be assigned to a Context
- Select the slice and all elements within - including Specifications
- Draw a Slice around selected elements - or empty if none selected
- Create a new slice based on the selected one - if a State View is selected, models a State Change and vice versa
- Name of the slice - has to start with “slice:” (will be added automatically if missing)
- Slice Status
- Assign a context to the slice - You can select all slices and assign the context to all in one go
- Define Status as Border - if unchecked, the whole slices is colored
Slice Status
The slice status helps you track the progress of implementation and planning:
- Done - Slice is fully implemented
- Assigned - Slice is assigned to a developer
- InProgress - Slice is being worked on
- Review - Slice is currently reviewed (code review, model review)
- Blocked - Slice is blocked
- Planned - Slice is planned for a future iteration
- Created - Initial status when slice is created
- Informational - Slice is just for information, no implementation needed
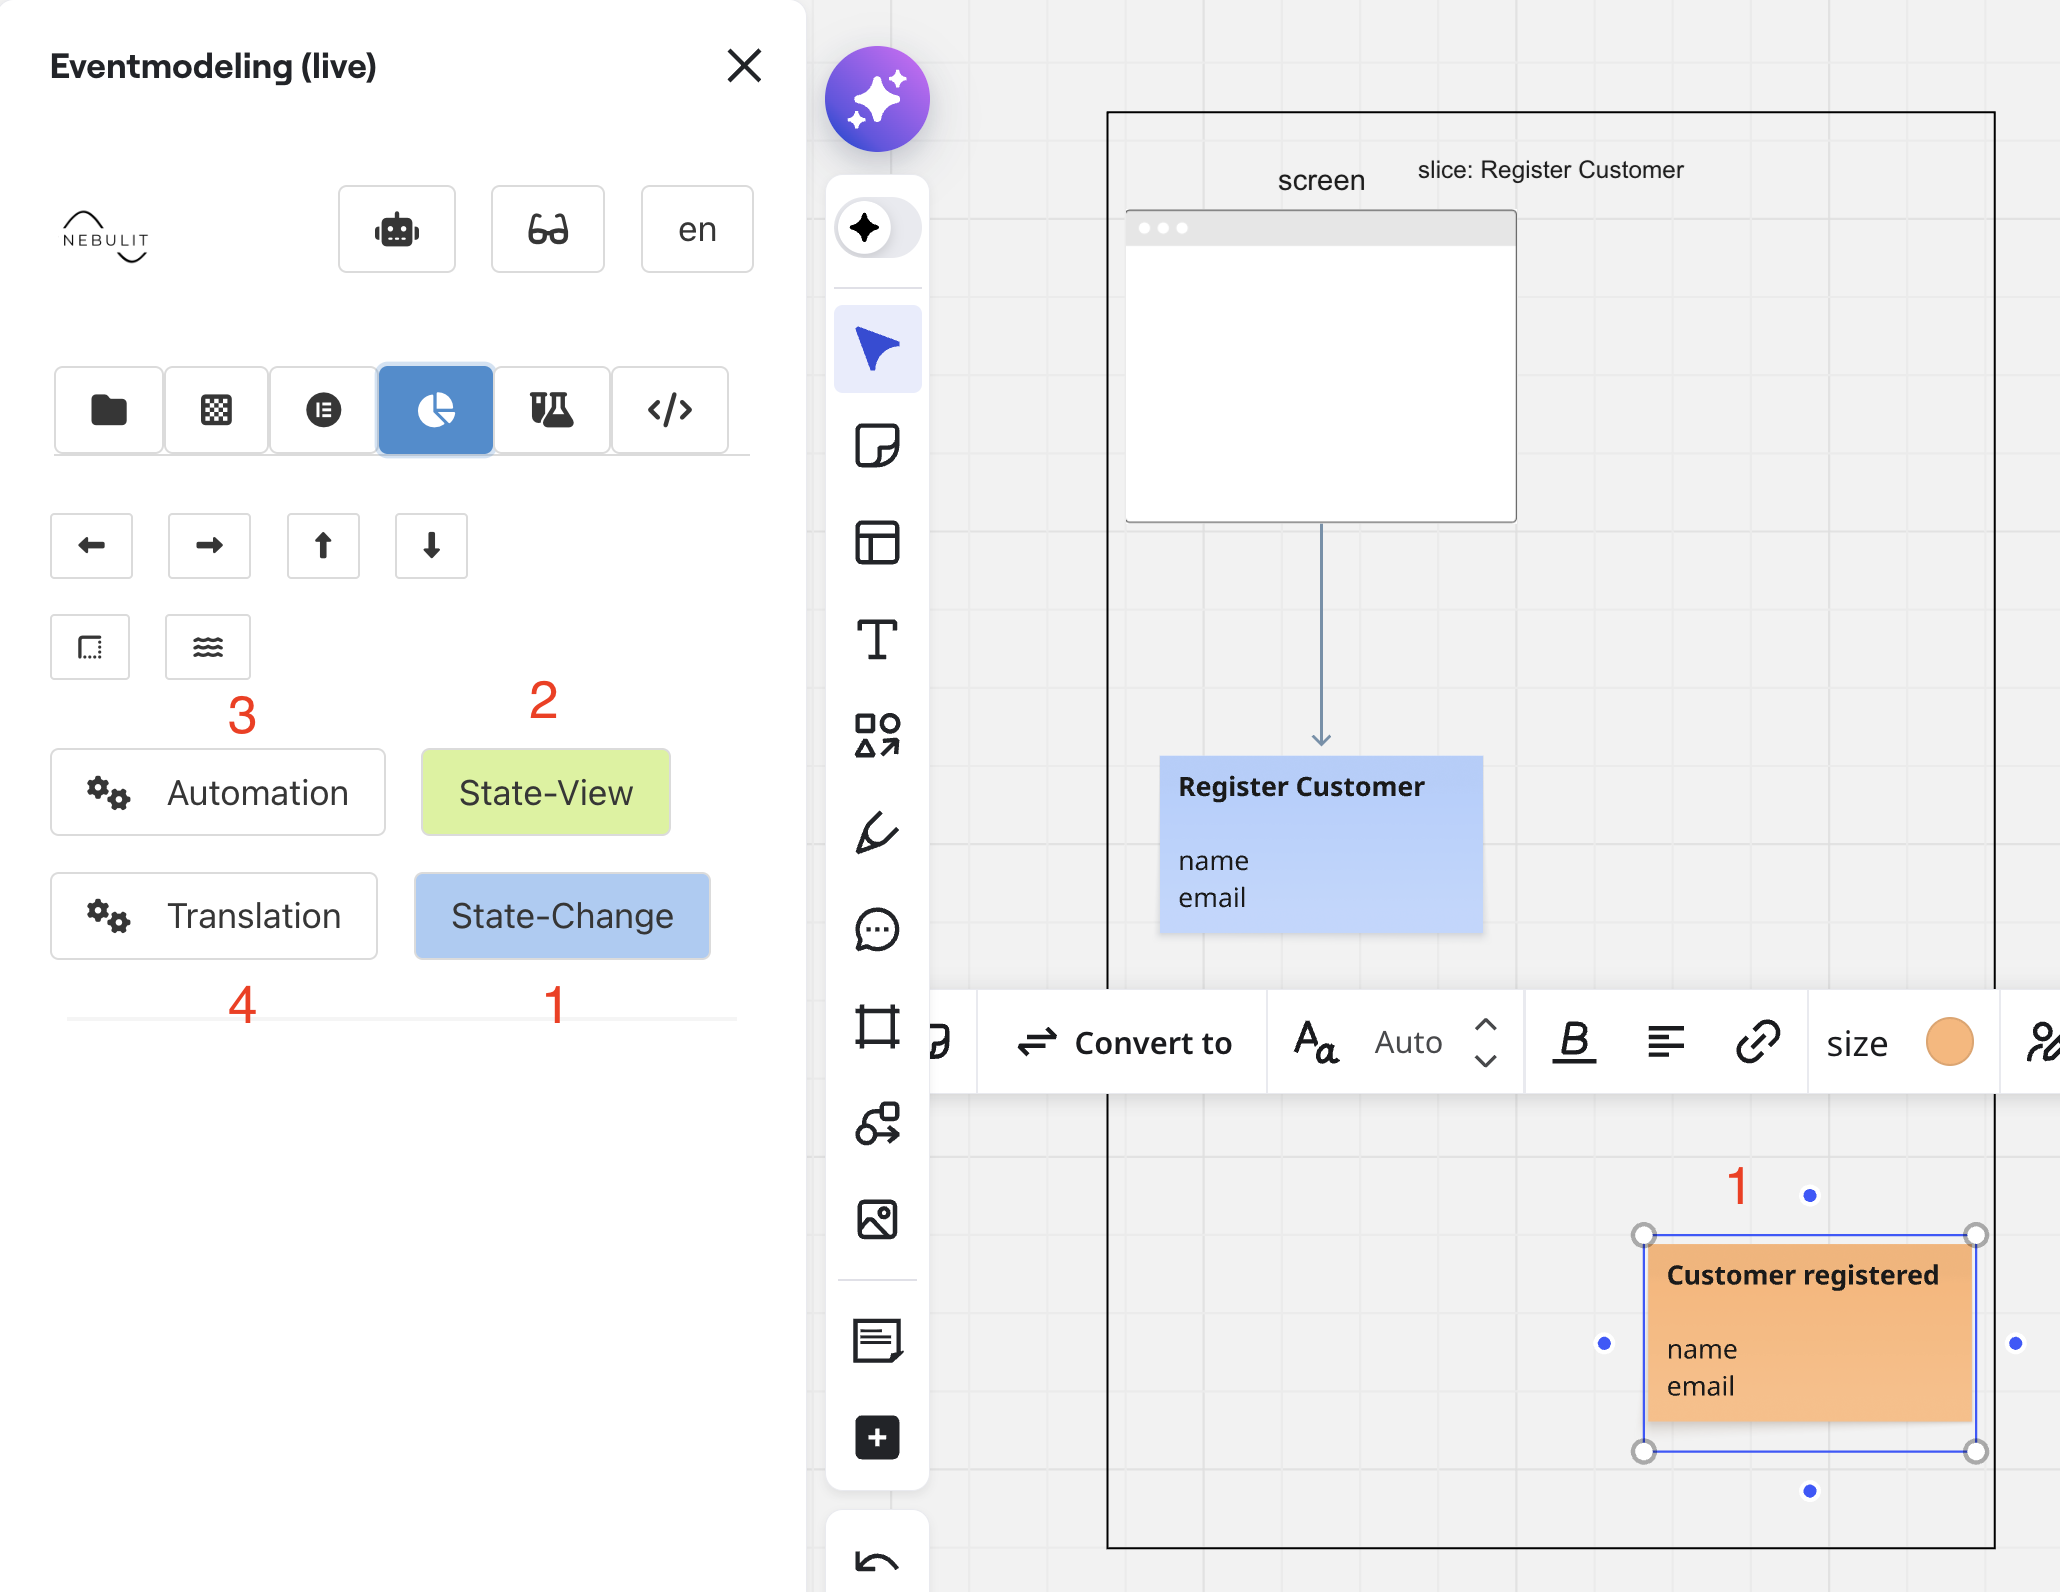
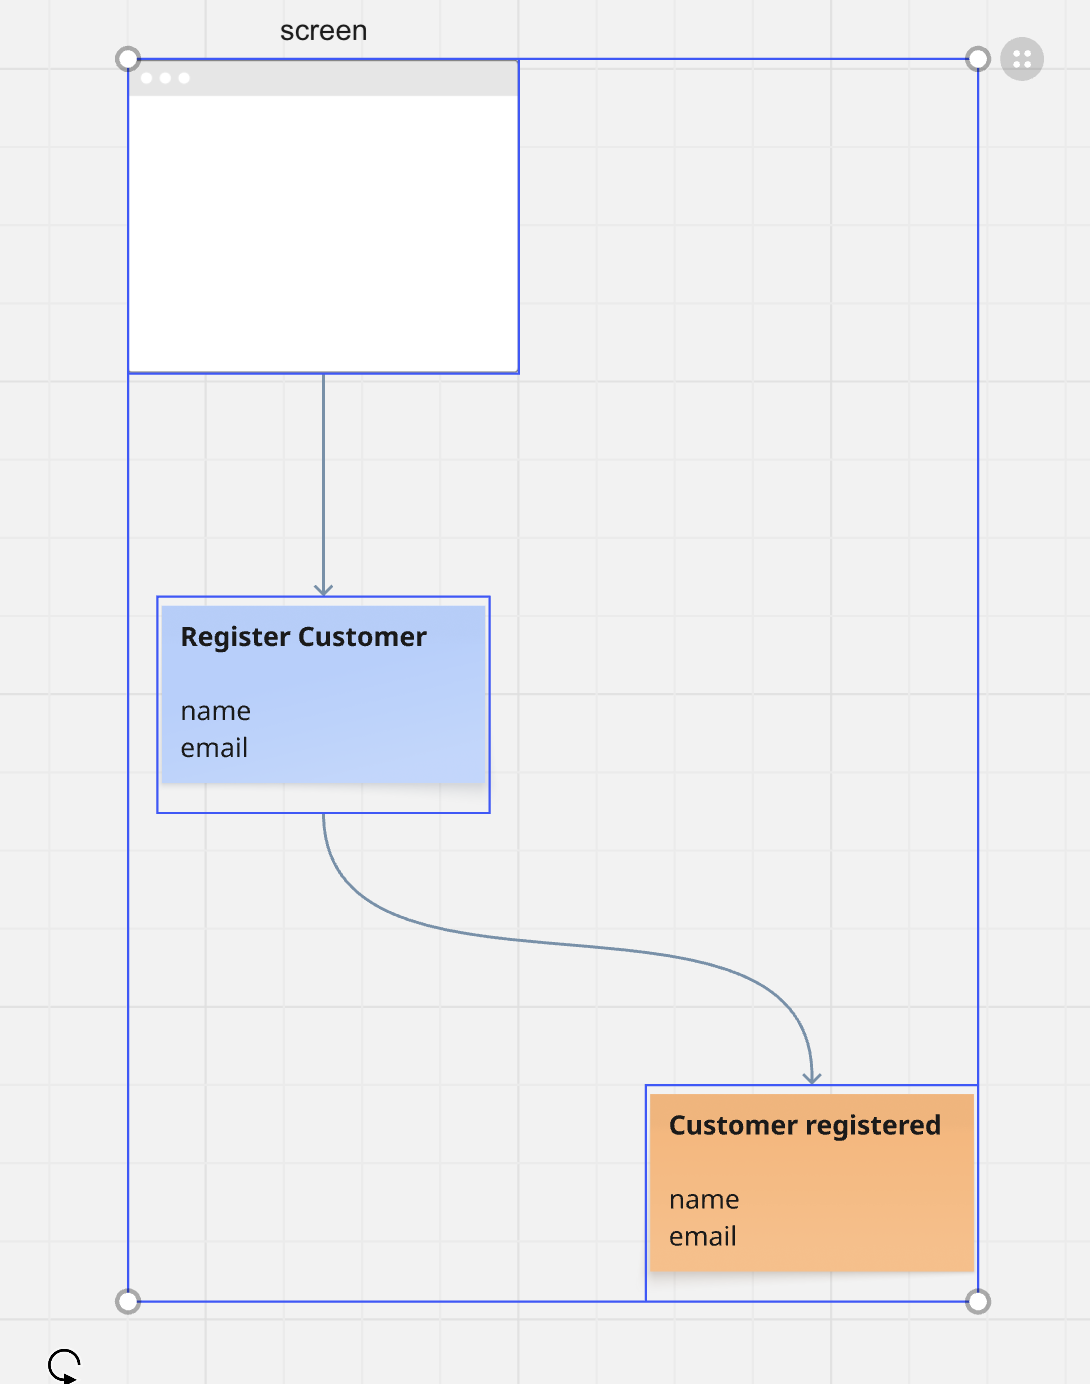
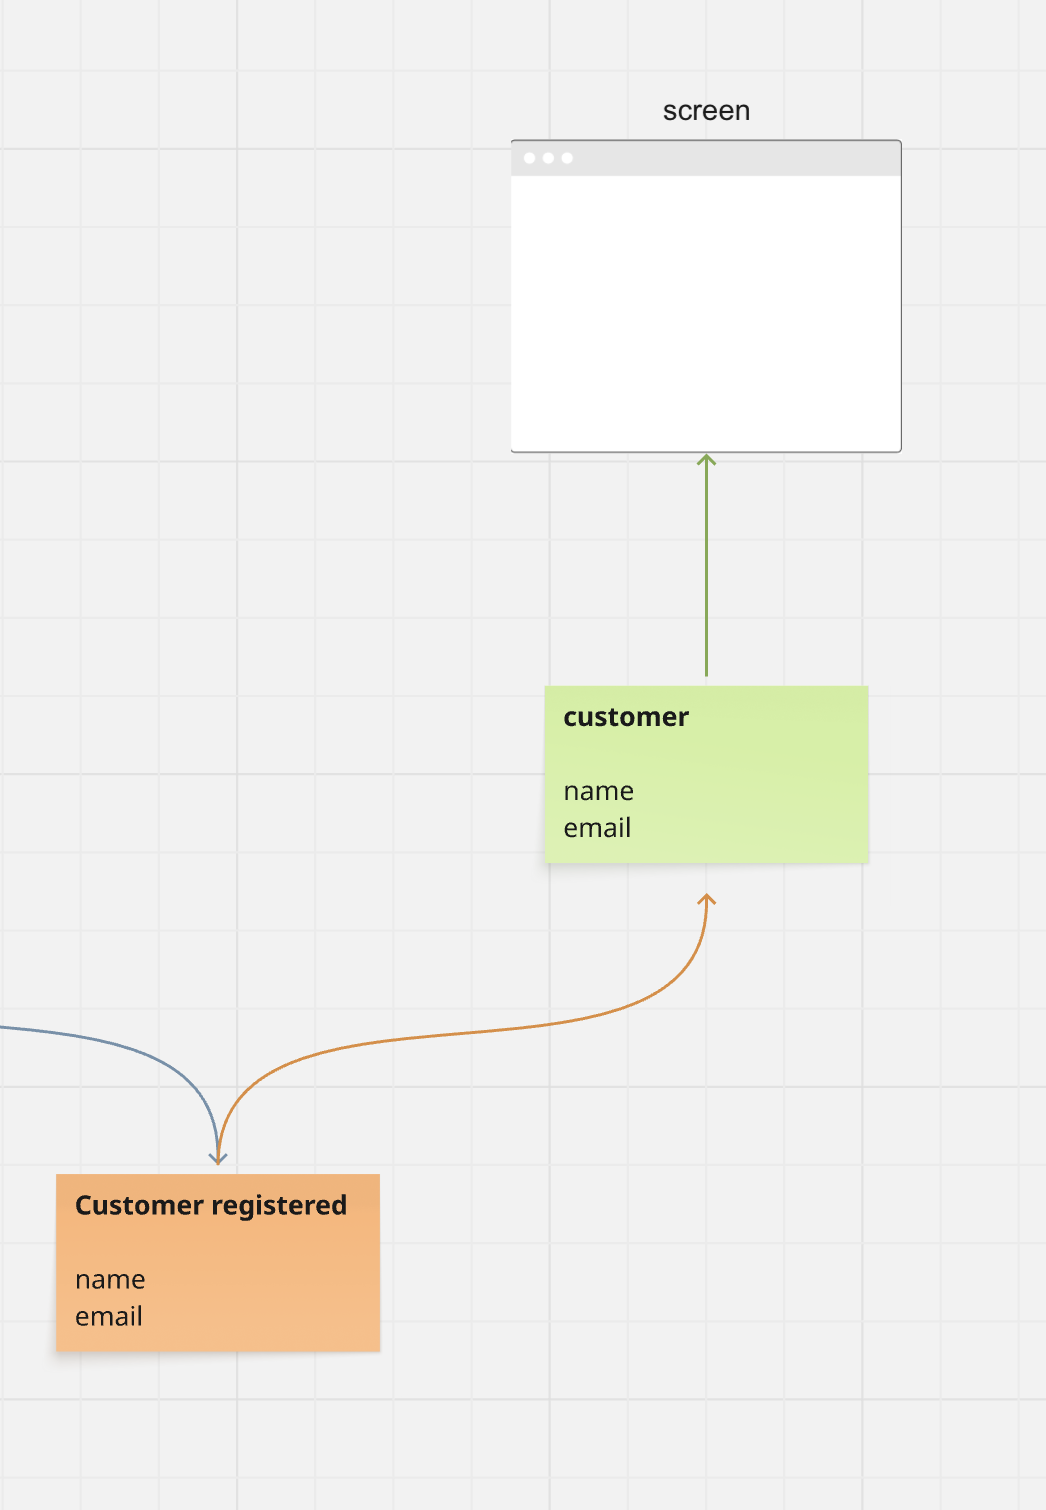
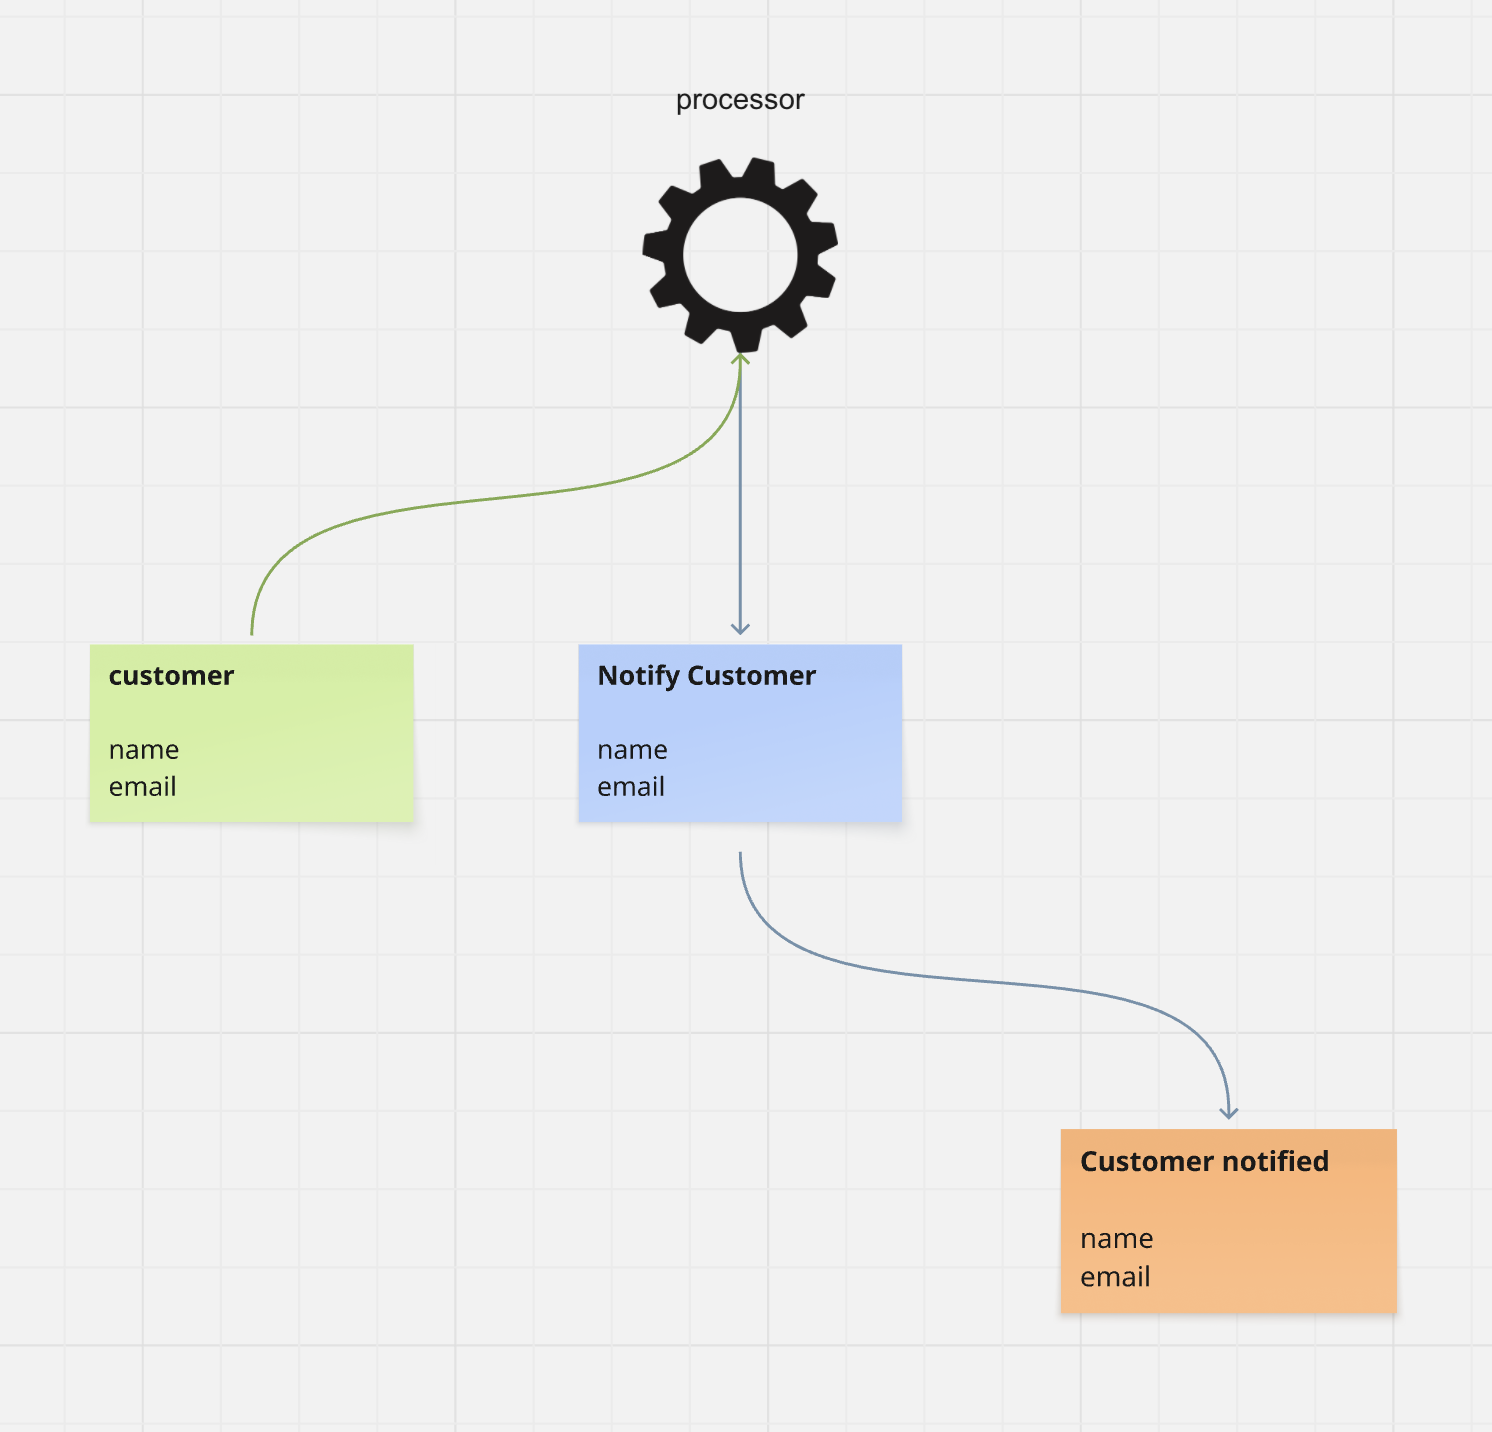
Example Slice

- Slice title
- Clickable Indicator - that this slice is assigned to a Context
- Slice Border - everything within the border belongs to the slice
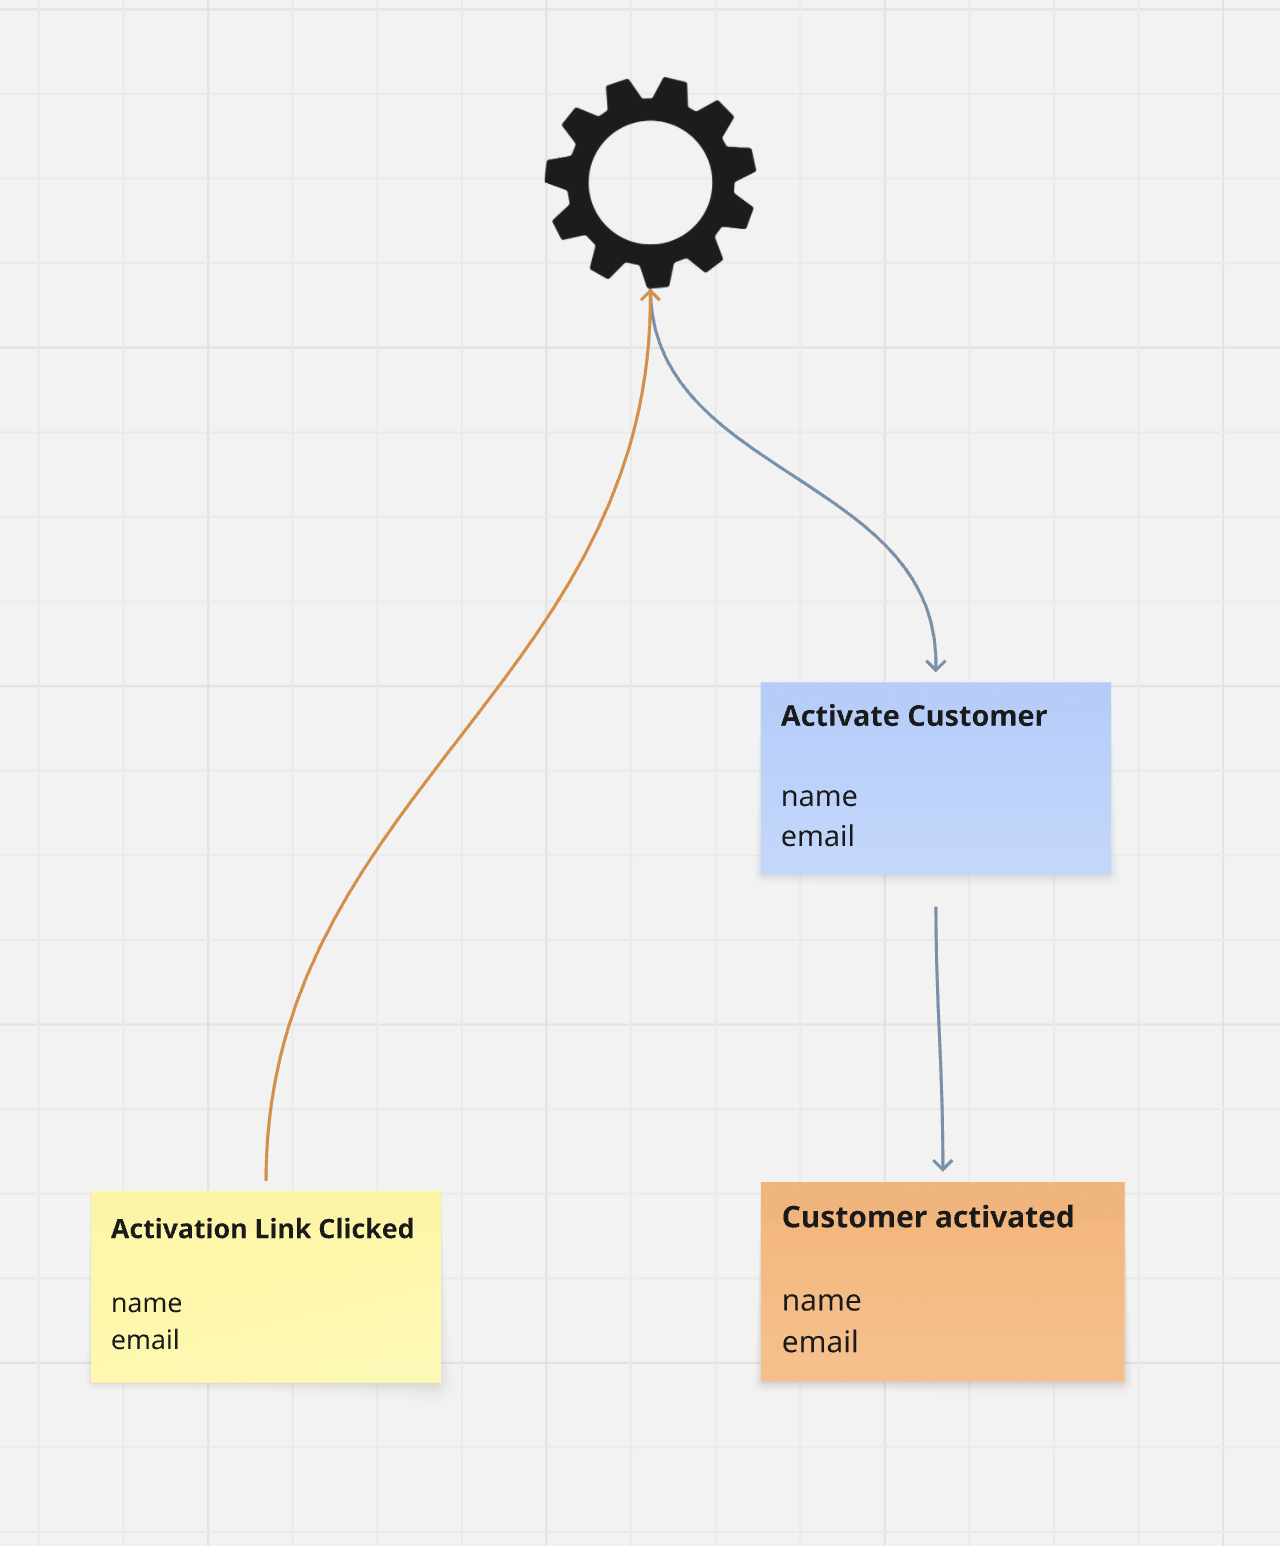
One Click Modeling
If you select just an Event ( and nothing else ), the one click modeling View becomes active. From here you can model the 4 known Patterns with just one click.
1) Create a State Change Slice
2) Create a State View Slice
3) Create an Automation
4) Create a Translation
Group in Swimlane
If at least one sticky note is selected, the button for “Group in Swimlane” activates. This button allows you to group all selected Sticky Notes in one Swimlane.
It also creates an Aggregate in the swimlane. Feel free to delete it if you don´t need it.
Sync Slices
Especially when you work with AI, it might happen that your slices are implemented locally and you want to reflect this back to your Event Model.
There is a Synchronization-View that allows you to do exactly that.
For this you need to become active, you have to have your local docker container running.
docker run -ti -p 3001:3000 -v $PWD:/workspace -e HOST_WORKSPACE=$PWD --name codegen --rm nebulit/codegen
If there is a mismatch between a local slice in your Git Repository and the Slice in the Model, you´ll get the possibility to sync the slices.
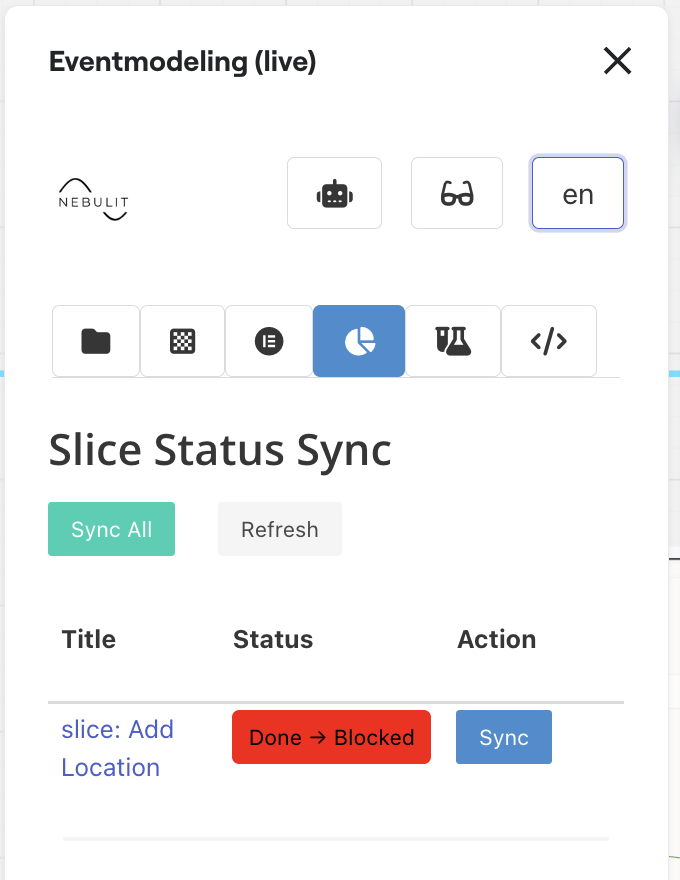
Technically, the sync checks the .slices/index.json file in your local git repository.
{
  "slices": [
    {
      "id": "3458764657126077599",
      "slice": "slice: Add Location",
      "index": 5,
      "context": "Restaurant Management",
      "folder": "addlocation",
      "status": "Done"
    },
    {
      "id": "3458764657126077647",
      "slice": "slice: Locations",
      "index": 8,
      "context": "Restaurant Management",
      "folder": "locations",
      "status": "Blocked"
    },
    ....
    ]
}
Next Steps
- Extend your existing Model with AI - AI Integration